Distillation

1L Standard Distillation Turnkey Setup
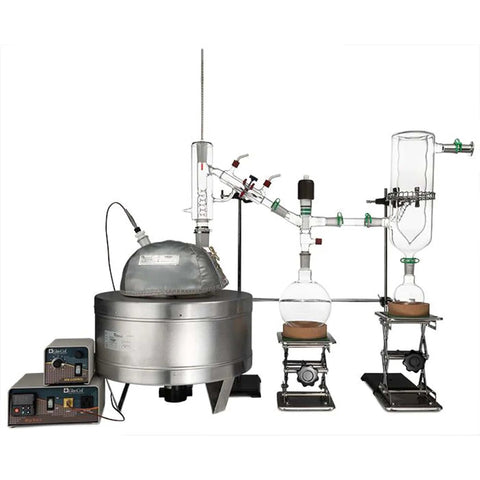
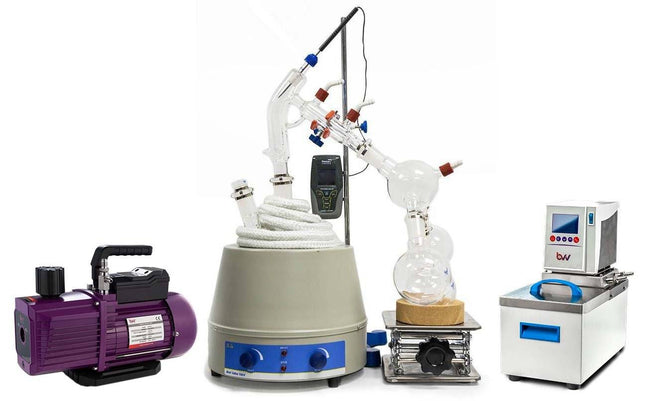
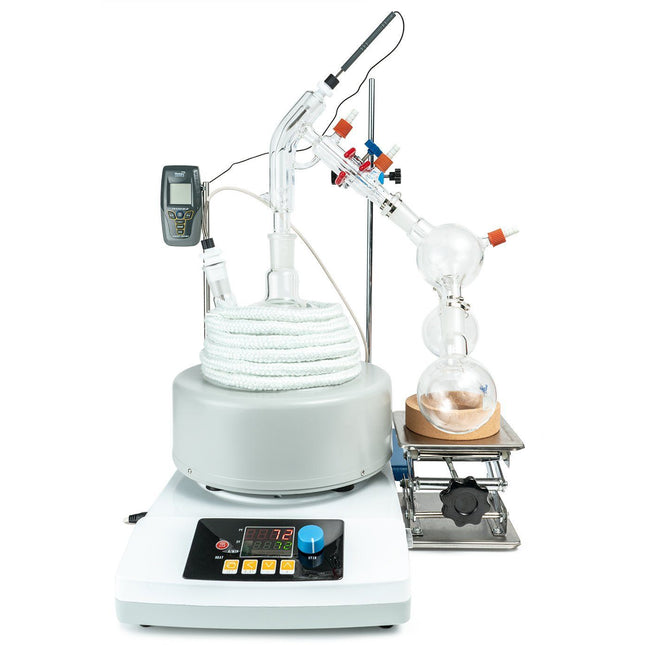
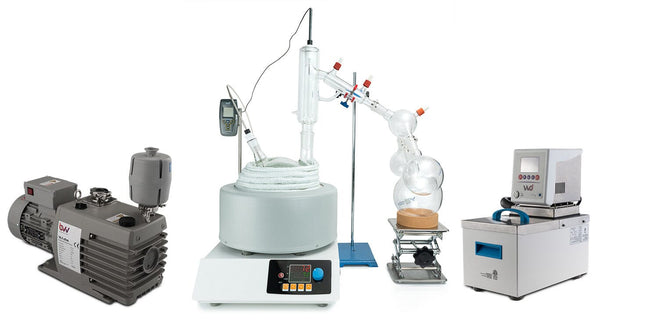
1L Standard Distillation Turnkey Setup The Standard Distillation Turnkey Setup includes all the components necessary to successfully perform distillation at an entry level price point. The Standard Turnkey Setup Includes: 1L Distillation Kit 1/4" Flare x 1/4" Barb Adapter BVV™ 5L Heated Circulator BVV™ V9D 9CFM Two Stage Vacuum Pump Distillation Quick Start Guide This guide gives basic quick start instructions for distillation systems. It is intended to provide a starting point for learning the process. Parameters should be adjusted to suit specific needs, Before beginning distillation, ensure the following steps have been taken: Vacuum Pump is in good working order. Pump should be run against dry load to allow internals to warm up. Oil should be clear. Cloudy or dark oil should be changed. All glass components are in good working order and ready to be assembled A winterization and degassing procedure has been done to prepare oil for distillation Once all three of these steps have been completed, you are ready to begin distilling. Begin by placing stir bar in boiling flask and then load your material. This should be done using a funnel. A small amount of alcohol in the oil will give it a thinner consistency making it easier to transfer. Assemble all glassware and ensure each joint is properly greased. Do not use too much, as the vacuum pressure might pull some grease into the system. To ensure a full seal, spread grease in a circular motion by rotating glassware Attach circulator to condenser and set temperature to 50C. Allow circulator to reach temperature before beginning distillation. Connect vacuum pump to manifold. The manifold will allow you to isolate each individual component as well as let atmosphere into and out of the system. Connect receiving cow to cold trap. Connect cold trap to manifold. Connect vacuum gauge to manifold. At this point, ensure all connections are correct. Also ensure receiving cow is positioned to collect the first fraction in the far-left receiving flask. Circulator should be at its set temperature. Turn on vacuum pump to begin process. Turn on heat and set to 60C. Vacuum pump will begin to pull down and temperature will begin to rise. Watch the gauge to monitor vacuum pressure and stability. Start stir slower and increase speed with temperature. Once you are close to 60C, increase the temperature 20 degrees. Continue to raise the heat incrementally in 20-degree steps, increasing the set temperature as you near your set point. Increase temperatures incrementally until you reach 220C. You will see your first fraction somewhere between 180C and 190C or slightly before. This is the “heads” fraction. You will move to your second fraction when you see an increased reaction in the head, a slight color change toward golden, as well as a thickening of distillate. When this fraction hits, allow the distillate to “self-clean” the head for a minute or two then, rotate the cow to the middle receiving flask. Collect your “main body” fraction. You will see temps between 190-220C during this fraction. Continue to increase stirring speed as necessary. Reaction in the head may vary but it should never stop. As fluid level in the boiling flask decreases, increase stir speed. The final “tails” fraction is a mixture of the first and second fractions and should be saved for re-distillation later. Ideally, you want to turn the cow to the final flask before the tails fraction hits. The “tails” fraction has an obvious color change and will be darker than the “main body” fraction. You will see temps between 200-250C during this fraction. As fluid level in the boiling flask decreases even more, set stirring RPM higher (1000+ RPM). You may need to compensate with a bit more heat to finish of the final fraction as well. Once process is complete, stop heat, stop stir, and stop vacuum. Let atmosphere into the system. Be sure to properly store your distillate as exposure to air and light can cause oxidation. ***Note: This entire setup will ship via motor freight.*** *Notice to Customers: All units are inspected for broken glassware or parts before leaving BVV™. If the unit arrives damaged (this does not include minor imperfections or scuffs in glassware), the customer MUST contact BVV™ within 72 hours from carrier delivery to file a claim. If the customer DOES NOT contact BVV™ within 72 hours from carrier delivery, then BVV™ cannot issue any replacement(s) or compensation for the item; a new purchase will need to be made for a replacement. BVV™ is not responsible for the failure of glassware which must be inspected before and after every use because it may eventually develop imperfections or damage through normal usage, mishandling, and stress caused by temperature variations. If an imperfection or damage is noted while inspecting the glassware DO NOT use the glassware because it can fail, which can cause bodily harm or damage to the surrounding area.
$2,100.00 - $2,350.00
1L Distillation Kit
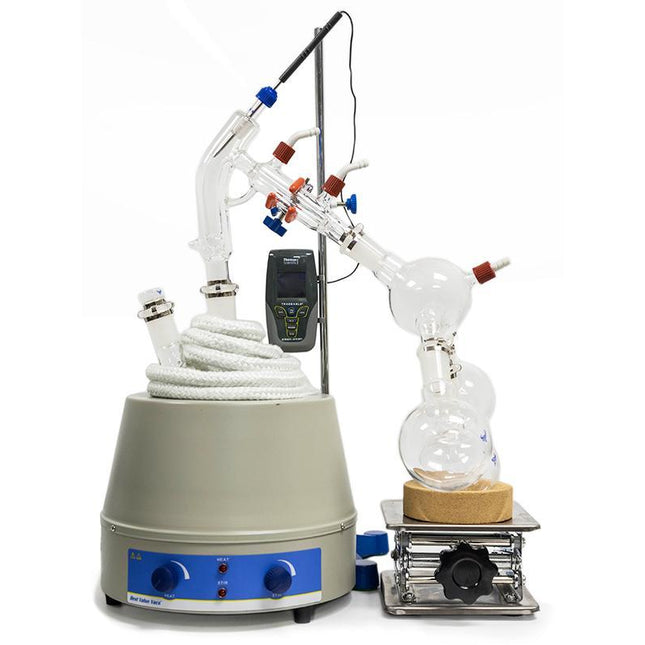
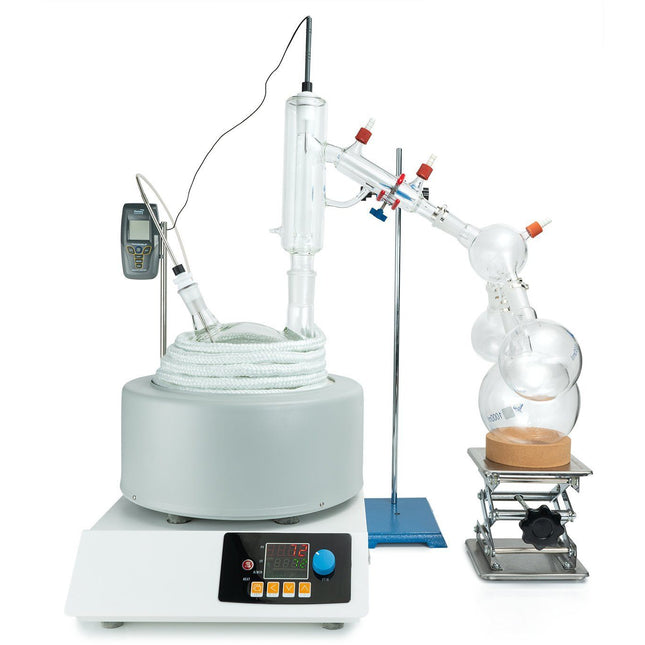
1L Distillation Kit The 1L Distillation Kit is a simple, easy to use system designed for small personal use. It includes all stands, clamps, clips, and tubing needed to begin distilling immediately. This Kit Does NOT include a vacuum pump or circulator. Please see the below recommendations for both as well as recommended add-ons. Or check out our 1L Standard Distillation Turnkey Setup which includes vacuum pump and circulator. Recommended Vacuum Pumps: Pro Series 5.6CFM Corrosion Resistant Two Stage Vacuum Pump (premium option) Just Better 6 CFM 2 Stage Deep Vacuum Pump (USA made economy option) Best Value Vacs VE280 9CFM Two Stage Vacuum Pump (economy option) Recommended Circulator: Polyscience 7 Liter MX Heated Circulator (economy option) Polyscience 7 Liter MX Refrigerated Circulator (premium option with chilling capability) Recommended Add-Ons: Glass Dewar Style Cold Trap (recommended cold trap) Bullseye Precison Vacuum Gauge (premium vacuum gauge for measuring depth) CT40 or CT80 Electronic Cold Trap (electronic cold trap, dry ice replacement) Specifications: Boiling Flask Size: 1L Receveiving Flask Size: 250ml Batch Capacity approximate: 200-400 grams Run time: 4 to 8 hours dependent upon material composition and throughput Distillation Temperature Range: 140-250C (Do not exceed 250C) Recommended Condenser Temperature: 40-50C This Kit Includes: Glass Components: 1L 2-Neck Boiling Flask Short Path Head Triple Neck Cow Receiving Flask 3x 250ml Single Neck Round Bottom Flask 14/20 Thermometer Adapter 24/40 Thermometer Adapter 120mm Glass Funnel 14/20 Stopper 24/40 Stopper Accessories: Magnetic PTFE Stirring Bar Retriever 5 Pack of Metal Keck Clips Dow Corning High Vacuum Silicone Grease Tripod Stand 1L Analog Heating and Stirring Mantle 3 Finger Clamp Adjustable 0-70mm Boss Head -13mm 6" x 6" Scissor Jack 250-500ml Cork Stand 10ft of Vacuum Hose 10ft of Chiller Hose 1/4" Vacuum Manifold Traceable Kangaroo Thermometer - Digital 10 Pack of Adjustable Stainless Steel Tubing Clamps Fiberglass Insulation Rope 10 Feet 1.5 Gallon Cold Trap (2QT Tank) Dry Ice, Liquid Nitrogen w/ 2x 1/4" Barb Adapters Distillation Quick Start Guide This guide gives basic quick start instructions for distillation systems. It is intended to provide a starting point for learning the process. Parameters should be adjusted to suit specific needs, Before beginning distillation, ensure the following steps have been taken: Vacuum Pump is in good working order. Pump should be run against dry load to allow internals to warm up. Oil should be clear. Cloudy or dark oil should be changed. All glass components are in good working order and ready to be assembled A winterization and degassing procedure has been done to prepare oil for distillation Once all three of these steps have been completed, you are ready to begin distilling. Begin by placing stir bar in boiling flask and then load your material. This should be done using a funnel. A small amount of alcohol in the oil will give it a thinner consistency making it easier to transfer. Assemble all glassware and ensure each joint is properly greased. Do not use too much, as the vacuum pressure might pull some grease into the system. To ensure a full seal, spread grease in a circular motion by rotating glassware Attach circulator to condenser and set temperature to 50C. Allow circulator to reach temperature before beginning distillation. Connect vacuum pump to manifold. The manifold will allow you to isolate each individual component as well as let atmosphere into and out of the system. Connect receiving cow to cold trap. Connect cold trap to manifold. Connect vacuum gauge to manifold. At this point, ensure all connections are correct. Also ensure receiving cow is positioned to collect the first fraction in the far-left receiving flask. Circulator should be at its set temperature. Turn on vacuum pump to begin process. Turn on heat and set to 60C. Vacuum pump will begin to pull down and temperature will begin to rise. Watch the gauge to monitor vacuum pressure and stability. Start stir slower and increase speed with temperature. Once you are close to 60C, increase the temperature 20 degrees. Continue to raise the heat incrementally in 20-degree steps, increasing the set temperature as you near your set point. Increase temperatures incrementally until you reach 220C. You will see your first fraction somewhere between 180C and 190C or slightly before. This is the “heads” fraction. You will move to your second fraction when you see an increased reaction in the head, a slight color change toward golden, as well as a thickening of distillate. When this fraction hits, allow the distillate to “self-clean” the head for a minute or two then, rotate the cow to the middle receiving flask. Collect your “main body” fraction. You will see temps between 190-220C during this fraction. Continue to increase stirring speed as necessary. Reaction in the head may vary but it should never stop. As fluid level in the boiling flask decreases, increase stir speed. The final “tails” fraction is a mixture of the first and second fractions and should be saved for re-distillation later. Ideally, you want to turn the cow to the final flask before the tails fraction hits. The “tails” fraction has an obvious color change and will be darker than the “main body” fraction. You will see temps between 200-250C during this fraction. As fluid level in the boiling flask decreases even more, set stirring RPM higher (1000+ RPM). You may need to compensate with a bit more heat to finish of the final fraction as well. Once process is complete, stop heat, stop stir, and stop vacuum. Let atmosphere into the system. Be sure to properly store your distillate as exposure to air and light can cause oxidation. *Notice to Customers: All units are inspected for broken glassware or parts before leaving BVV™. If the unit arrives damaged (this does not include minor imperfections or scuffs in glassware), the customer MUST contact BVV™ within 72 hours from carrier delivery to file a claim. If the customer DOES NOT contact BVV™ within 72 hours from carrier delivery, then BVV™ cannot issue any replacement(s) or compensation for the item; a new purchase will need to be made for a replacement. BVV™ is not responsible for the failure of glassware which must be inspected before and after every use because it may eventually develop imperfections or damage through normal usage, mishandling, and stress caused by temperature variations. If an imperfection or damage is noted while inspecting the glassware DO NOT use the glassware because it can fail, which can cause bodily harm or damage to the surrounding area.
$900.00
2L Short Path Distillation Kit
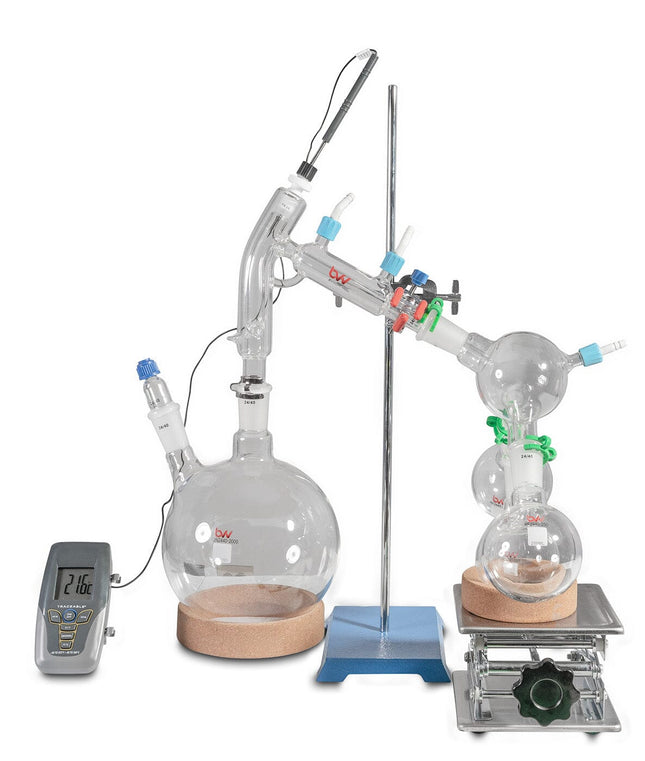
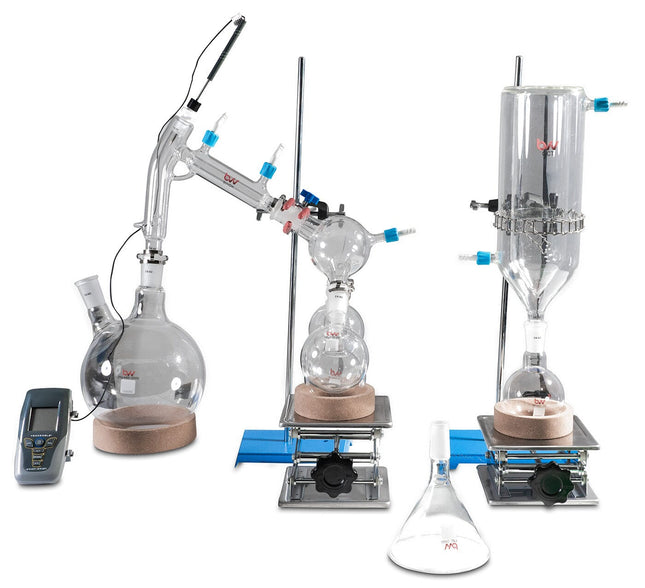
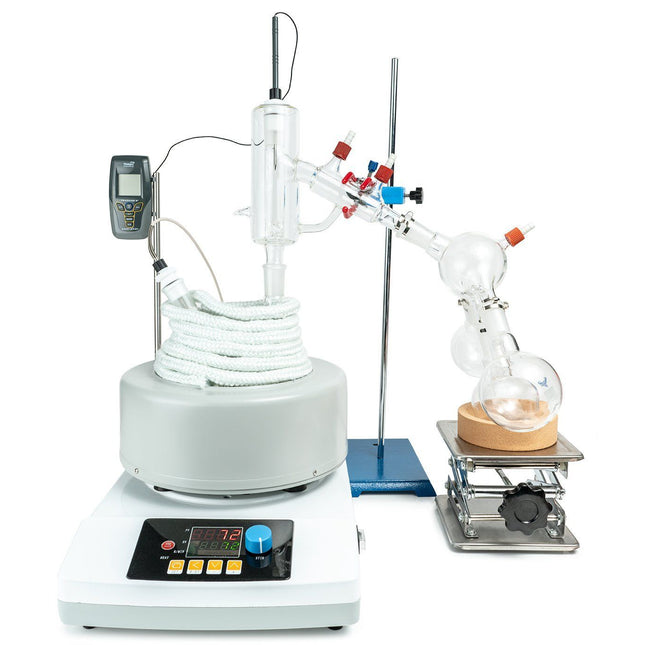
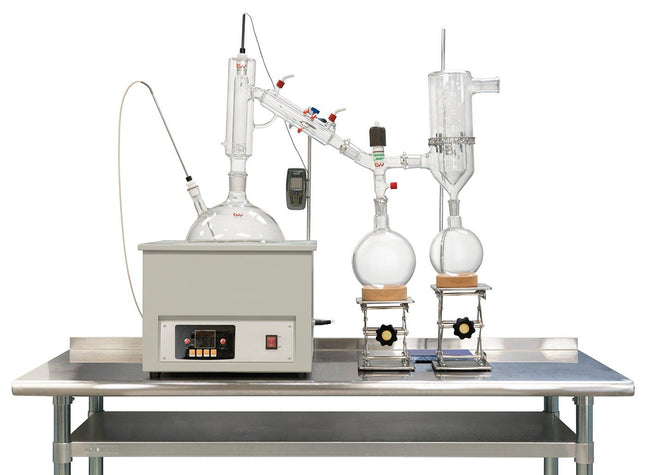
Short Path Distillation Setup Short path distillation is used for compounds that are not stable at high temperatures. It can also be used to purify small amounts of a compound. For those new to this type of distillation, our Short Path Kit includes everything you will need as you get started. All stands, clamps, clips, and tubing are included, which means it’s ready to start working straight out of the box. The cold trap, cow and vacuum grease can all be customized to meet your needs. The 2L Distillation Kit builds upon the same principal as the 1L Distillation Kit, giving users an easy to use system that will get them up and running at an affordable price. It includes all stands, clamps, clips, and tubing needed to begin distilling immediately. This Kit Does NOT include a vacuum pump or circulator. Please see the below recommendations for both as well as recommended add-ons. Or check out our 2L Standard Distillation Turnkey Setup which includes vacuum pump and circulator. Crossbar pictured is not included. We recommend purchasing multiple lab stands to accommodate your specific needs. Recommended Vacuum Pumps: Pro Series 5.6CFM Corrosion Resistant Two Stage Vacuum Pump (recommended option) Just Better 6 CFM 2 Stage Deep Vacuum Pump (economy option) Best Value Vacs VE280 9CFM Two Stage Vacuum Pump (economy option) Recommended Circulators: Polyscience 7 Liter MX Heated Circulator (economy option) Polyscience 7 Liter MX Refrigerated Circulator (premium option with chilling capability) Recommended Add-Ons: Glass Dewar Style Cold Trap (recommended cold trap) Bullseye Precison Vacuum Gauge (premium vacuum gauge for measuring depth) CT40 or CT80 Electronic Cold Trap (electronic cold trap, dry ice replacement) Short Path Distillation Kit Specifications: Boiling Flask Size: 2L Recieving Flask Size: 250ml Batch Capacity approximate: 2L = 400-1000 grams Run time: 4 to 8 hours dependent upon material composition and throughput Distillation Temperature Range: 140-250C (Do not exceed 250C) Recommended Condenser Temperature: 40-50C This Kit Comes Standard With The Following: Glass Components: 2L 2-Neck Boiling Flask Short Path Head Triple Neck Cow 3x 250mL Single Neck Receiving Flask 1/8" 14/20 PTFE Thermometer Adapter 1/4" 24/40 PTFE Thermometer Adapter 120mm Glass Funnel Accessories: Magnetic PTFE Stirring Bar Retriever 5 Pack of Metal Keck Clips Dow Corning High Vacuum Silicone Grease Tripod Stand 2L Digital Heating and Stirring Mantle 3 Finger Clamp Adjustable 0-70mm 6" x 6" Scissor Jack 250-500ml Cork Stand 10ft of Vacuum Hose 10ft of Chiller Hose 1/4" Vacuum Manifold Traceable Kangaroo Thermometer - Digital 10 Pack of Adjustable Stainless Steel Tubing Clamps Fiberglass Insulation Rope 10 Feet 1.5 Gallon Cold Trap (2QT Tank) Dry Ice, Liquid Nitrogen w/ 2x 1/4" Barb Adapters Distillation Quick Start Guide This guide gives basic quick start instructions for distillation systems. It is intended to provide a starting point for learning the process. Parameters should be adjusted to suit specific needs. Before beginning distillation, ensure the following steps have been taken: Vacuum Pump is in good working order. Pump should be run against dry load to allow internals to warm up. Oil should be clear. Cloudy or dark oil should be changed. All glass components are in good working order and ready to be assembled A winterization and degassing procedure has been done to prepare oil for distillation Once all three of these steps have been completed, you are ready to begin distilling. Begin by placing stir bar in boiling flask and then load your material. This should be done using a funnel. A small amount of alcohol in the oil will give it a thinner consistency making it easier to transfer. Assemble all glassware and ensure each joint is properly greased. Do not use too much, as the vacuum pressure might pull some grease into the system. To ensure a full seal, spread grease in a circular motion by rotating glassware Attach circulator to condenser and set temperature to 50C. Allow circulator to reach temperature before beginning distillation. Connect vacuum pump to manifold. The manifold will allow you to isolate each individual component as well as let atmosphere into and out of the system. Connect receiving cow to cold trap. Connect cold trap to manifold. Connect vacuum gauge to manifold. At this point, ensure all connections are correct. Also ensure receiving cow is positioned to collect the first fraction in the far-left receiving flask. Circulator should be at its set temperature. Turn on vacuum pump to begin process. Turn on heat and set to 60C. Vacuum pump will begin to pull down and temperature will begin to rise. Watch the gauge to monitor vacuum pressure and stability. Start stir slower and increase speed with temperature. Once you are close to 60C, increase the temperature 20 degrees. Continue to raise the heat incrementally in 20-degree steps, increasing the set temperature as you near your set point. Increase temperatures incrementally until you reach 220C. You will see your first fraction somewhere between 180C and 190C or slightly before. This is the “heads” fraction. You will move to your second fraction when you see an increased reaction in the head, a slight color change toward golden, as well as a thickening of distillate. When this fraction hits, allow the distillate to “self-clean” the head for a minute or two then, rotate the cow to the middle receiving flask. Collect your “main body” fraction. You will see temps between 190-220C during this fraction. Continue to increase stirring speed as necessary. Reaction in the head may vary but it should never stop. As fluid level in the boiling flask decreases, increase stir speed. The final “tails” fraction is a mixture of the first and second fractions and should be saved for re-distillation later. Ideally, you want to turn the cow to the final flask before the tails fraction hits. The “tails” fraction has an obvious color change and will be darker than the “main body” fraction. You will see temps between 200-250C during this fraction. As fluid level in the boiling flask decreases even more, set stirring RPM higher (1000+ RPM). You may need to compensate with a bit more heat to finish of the final fraction as well. Once process is complete, stop heat, stop stir, and stop vacuum. Let atmosphere into the system. Be sure to properly store your distillate as exposure to air and light can cause oxidation. Learn more about short path distillation components and FAQs with this distillation guide. *Notice to Customers: All units are inspected for broken glassware or parts before leaving BVV™. If the unit arrives damaged (this does not include minor imperfections or scuffs in glassware), the customer MUST contact BVV™ within 72 hours from carrier delivery to file a claim. If the customer DOES NOT contact BVV™ within 72 hours from carrier delivery, then BVV™ cannot issue any replacement(s) or compensation for the item; a new purchase will need to be made for a replacement. BVV™ is not responsible for the failure of glassware which must be inspected before and after every use because it may eventually develop imperfections or damage through normal usage, mishandling, and stress caused by temperature variations. If an imperfection or damage is noted while inspecting the glassware DO NOT use the glassware because it can fail, which can cause bodily harm or damage to the surrounding area.
$1,275.00
2L Standard Short Path Parts Kit
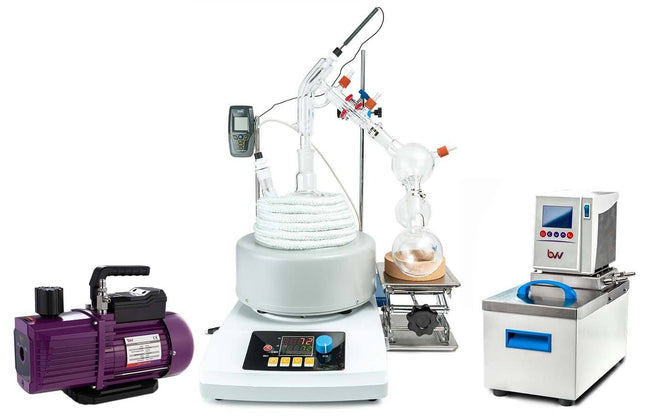
Short Path Distillation Setup Short path distillation is used for compounds that are not stable at high temperatures. It can also be used to purify small amounts of a compound. The 2L Distillation Kit gives users an easy to use system that will get them up and running at an affordable price. It includes all stands, clamps, clips, This Kit Does NOT include a vacuum pump, circulator, or heating source. Please see the below recommendations for both as well as recommended add-ons. Or check out our 2L Standard Distillation Turnkey Setup which includes vacuum pump, circulator, and mantle. Recommended Vacuum Pumps: Pro Series 5.6CFM Corrosion Resistant Two Stage Vacuum Pump (recommended option) Just Better 6 CFM 2 Stage Deep Vacuum Pump (economy option) Best Value Vacs VE280 9CFM Two Stage Vacuum Pump (economy option) Recommended Circulators: Polyscience 7 Liter MX Heated Circulator (economy option) Polyscience 7 Liter MX Refrigerated Circulator (premium option with chilling capability) Recommended Heating Mantle: BVV 2L Heating Mantle Recommended Add-Ons: Glass Dewar Style Cold Trap (recommended cold trap) Bullseye Precison Vacuum Gauge (premium vacuum gauge for measuring depth) CT40 or CT80 Electronic Cold Trap (electronic cold trap, dry ice replacement) Short Path Distillation Kit Specifications: Boiling Flask Size: 2L Recieving Flask Size: 250ml Batch Capacity approximate: 2L = 400-1000 grams Run time: 4 to 8 hours dependent upon material composition and throughput Distillation Temperature Range: 140-250C (Do not exceed 250C) Recommended Condenser Temperature: 40-50C This Kit Comes Standard With The Following: Glass Components: 2L 2-Neck Boiling Flask Short Path Head Triple Neck Cow 3x 250mL Single Neck Receiving Flask 1/8" 14/20 PTFE Thermometer Adapter 1/4" 24/40 PTFE Thermometer Adapter 120mm Glass Funnel Accessories: Magnetic PTFE Stirring Bar Retriever Keck Clips 3 Finger Clamp Adjustable 0-70mm Boss head 6" x 6" Scissor Jack 250-500ml Cork Stand Traceable Kangaroo Thermometer - Digital Distillation Quick Start Guide This guide gives basic quick start instructions for distillation systems. It is intended to provide a starting point for learning the process. Parameters should be adjusted to suit specific needs. Before beginning distillation, ensure the following steps have been taken: Vacuum Pump is in good working order. Pump should be run against dry load to allow internals to warm up. Oil should be clear. Cloudy or dark oil should be changed. All glass components are in good working order and ready to be assembled A winterization and degassing procedure has been done to prepare oil for distillation Once all three of these steps have been completed, you are ready to begin distilling. Begin by placing stir bar in boiling flask and then load your material. This should be done using a funnel. A small amount of alcohol in the oil will give it a thinner consistency making it easier to transfer. Assemble all glassware and ensure each joint is properly greased. Do not use too much, as the vacuum pressure might pull some grease into the system. To ensure a full seal, spread grease in a circular motion by rotating glassware Attach circulator to condenser and set temperature to 50C. Allow circulator to reach temperature before beginning distillation. Connect vacuum pump to manifold. The manifold will allow you to isolate each individual component as well as let atmosphere into and out of the system. Connect receiving cow to cold trap. Connect cold trap to manifold. Connect vacuum gauge to manifold. At this point, ensure all connections are correct. Also ensure receiving cow is positioned to collect the first fraction in the far-left receiving flask. Circulator should be at its set temperature. Turn on vacuum pump to begin process. Turn on heat and set to 60C. Vacuum pump will begin to pull down and temperature will begin to rise. Watch the gauge to monitor vacuum pressure and stability. Start stir slower and increase speed with temperature. Once you are close to 60C, increase the temperature 20 degrees. Continue to raise the heat incrementally in 20-degree steps, increasing the set temperature as you near your set point. Increase temperatures incrementally until you reach 220C. You will see your first fraction somewhere between 180C and 190C or slightly before. This is the “heads” fraction. You will move to your second fraction when you see an increased reaction in the head, a slight color change toward golden, as well as a thickening of distillate. When this fraction hits, allow the distillate to “self-clean” the head for a minute or two then, rotate the cow to the middle receiving flask. Collect your “main body” fraction. You will see temps between 190-220C during this fraction. Continue to increase stirring speed as necessary. Reaction in the head may vary but it should never stop. As fluid level in the boiling flask decreases, increase stir speed. The final “tails” fraction is a mixture of the first and second fractions and should be saved for re-distillation later. Ideally, you want to turn the cow to the final flask before the tails fraction hits. The “tails” fraction has an obvious color change and will be darker than the “main body” fraction. You will see temps between 200-250C during this fraction. As fluid level in the boiling flask decreases even more, set stirring RPM higher (1000+ RPM). You may need to compensate with a bit more heat to finish of the final fraction as well. Once process is complete, stop heat, stop stir, and stop vacuum. Let atmosphere into the system. Be sure to properly store your distillate as exposure to air and light can cause oxidation. Learn more about short path distillation components and FAQs with this distillation guide. *Notice to Customers: All units are inspected for broken glassware or parts before leaving BVV™. If the unit arrives damaged (this does not include minor imperfections or scuffs in glassware), the customer MUST contact BVV™ within 72 hours from carrier delivery to file a claim. If the customer DOES NOT contact BVV™ within 72 hours from carrier delivery, then BVV™ cannot issue any replacement(s) or compensation for the item; a new purchase will need to be made for a replacement. BVV™ is not responsible for the failure of glassware which must be inspected before and after every use because it may eventually develop imperfections or damage through normal usage, mishandling, and stress caused by temperature variations. If an imperfection or damage is noted while inspecting the glassware DO NOT use the glassware because it can fail, which can cause bodily harm or damage to the surrounding area.
$475.00
2L Short Path Parts Kit with Dry Ice Cold Trap
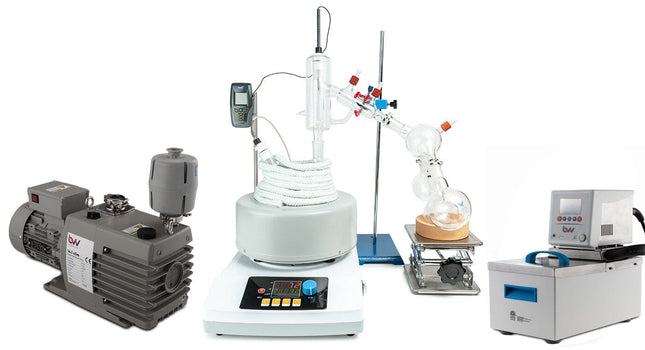
2L Short Path Parts Kit with Dry Ice Cold Trap This kit includes all the parts and fixturing to build a distillation setup with a 2L boiling flask. No heating or cooling equipment is included.
$750.00
2L Full Bore Short Path Distillation Turnkey Kit with P2 Distillation Head
2L Full Bore Short Path Distillation Turnkey Kit with P2 Distillation Head This unit carries a 2-day lead time The 2L Full Bore Short Path Distillation Turnkey Kit with P2 Distillation Head is a great setup for smaller scale processors that want a budget friendly system without sacrificing quality on the main components that make a short path great. We understand that as an operator our customers want to be able to start their system and operate in ideal conditions run after run. That is why we paired a full-bore setup with a 14.1CFM pump that will assure the lowest vacuum depth will be pulled every time. Main components such as the distillation head, vacuum valve adapter, and cold trap are all American blown glass. These components allow us to present this system that will repeat in performance time after time. For a in depth analysis of this system please view the following videos. Here you will see the system setup, component explanation, and even see it perform in a first and second distillation pass. These runs were all performed in our lab and the data was used to help fine tune the system. Video 1 - Setup and Component Explanation Video 2 - Setup Addendum Video 3 - Fist pass Distillation Video 4 - Second Pass Distillation The 2L Full Bore Short Path Distillation Turnkey Kit with P2 Distillation Head Includes: 1 First Pass Distillation Operating Procedure 1 P2 Distillation Kit 1 2L Double Neck Boiling Flask 1 Full Bore Vacuum Valve Adapter 1 BVV MP7H Heater 1 2L Heating Mantle 1 Ribbed Glass Cold Trap 1 Bullseye Precision Vacuum Gauge 1 BVV Pro Series 14.1CFM Rotary Vane Pump (Comes filled with oil. Recommend purchasing additional Ultra 19 Vacuum Pump Oil. SKU: INLAND19-ULTRS-1G) 1 Oil Mist Filter Trap for Rotary Vane Pump 1 24/40 250ml Single Neck Round Bottom Flask 3 24/40 500ml Single Neck Round Bottom Flask 1 24/40 Glass Funnel 1 Vacuum Manifold for Rotary Vane Pump 1 1 Meter Bellow Hose 1 PTFE Magnetic Stirring Bar Retriever 1 24/40 Metal Keck Clip 6 24/40 Plastic Keck Clips 3 250-500ml Cork Stands 2 Chain Clamps 1 Boss Head with 3 Finger Clamp 1 BVV Lab Stand 10 Fiber Glass Insulation Rope 1 Dow Corning High Vacuum Grease 1 10/30 Non-Mercury Glass Thermometers 1 24/40 – 10/30 Glass Adapter Bushing 1 24/40 – 1/8” Thermometer Adapter 1 24/40 Straight Adapter 2 6”x6” Scissor Jack 3 36” Threaded Lab Stand Rod 2 Gl14 – 8mm Barb 6 ¼” Silicone Tubing 2 PTFE Magnetic Stirring Bar 4 Hose Clamp with Butterfly Key ***Note: This entire setup will ship via motor freight.*** ***Note: All units are inspected for broken glass or parts before unit is shipped. If unit arrives damaged or glass is broken (this does not include minor imperfections or scuffs in glassware), Customer MUST contact BVV™ within 3 days of delivery to file a claim and receive a replacement part. If customer DOES NOT contact BVV™ within 3 days of delivery responsibility for replacement parts falls on the customer and they must pay for replacement pieces.*** ***Glassware Safety Disclaimer: BVV™ is not responsible for failure of glassware which must be inspected before and after every use because it may eventually develop imperfections or damage through normal usage, mishandling, and stress caused by temperature variations. If an imperfection or damage is noted while inspecting the glassware DO NOT use the glassware because it can fail causing bodily harm or damage to the surrounding area.***
$7,500.00
2L Short Path Distillation Kit with P2 Distillation Head
2L Short Path Distillation Kit with P2 Distillation Head The 2L Distillation Kit w/ P2 Distillation Head includes everything needed to perform distillation excluding the vacuum pump and chiller. This kit features our USA made P2 Distillation Head as well as USA made glass. It is designed with ease of use in mind and includes the highest quality components to ensure results are repeatable time and again. **This Kit Does NOT include a vacuum pump or circulator. Please see the below recommendations for both as well as recommended add-ons. Or check out our 2L Premium Turnkey Setup which includes vacuum pump and circulator.** Crossbar pictured is not included. We recommend purchasing multiple lab stands to accomodate your specific needs. Recommended Vacuum Pumps: Pro Series 5.6CFM Corrosion Resistant Two Stage Vacuum Pump (recommended option) Just Better 6 CFM 2 Stage Deep Vacuum Pump (USA made economy option) Welch 1400 DuoSeal 0.9 cfm 0.1 Micron Belt Drive Dual-Stage Pump Recommended Circulators: Polyscience 7 Liter MX Heated Circulator (economy option) Polyscience 7 Liter MX Refrigerated Circulator (premium option with chilling capability) Recommended Add-Ons: Glass Dewar Style Cold Trap (recommended cold trap) Bullseye Precison Vacuum Gauge (premium vacuum gauge for measuring depth) CT40 or CT80 Electronic Cold Trap (electronic cold trap, dry ice replacement) J-KEM Digital Vapor Temp Monitor (digital vapor temp monitor with data-logging capabilities) Specifications: Boiling Flask Size: 2L Receveiving Flask Size: 250mL Batch Capacity approximate: 2L = 400-1000 grams Run time: 4 to 8 hours dependent upon material composition and throughput Distillation Temperature Range: 140-250C (Do not exceed 250C) Recommended Condenser Temperature: 40-50C This Kit Includes: Glass components: 2L USA Made 2-Neck Boiling Flask P2 USA Made Distillation Head Triple Neck Cow 3x 250mL Receiving Flask 2x 24/40 Chemglass Thermometer Inlet Adapter 120mm Glass Funnel Accessories: Magnetic PTFE Stirring Bar Retriever 5 Pack of Metal Keck Clips Dow Corning High Vacuum Silicone Grease Tripod Stand 2L Digital Heating and Stirring Mantle 3 Finger Clamp Adjustable 0-70mm 6" x 6" Scissor Jack 250-500ml Cork Stand 10ft of Vacuum Hose 10ft of Chiller Hose 1/4" Vacuum Manifold Traceable Kangaroo Thermometer - Digital 10 Pack of Adjustable Stainless Steel Tubing Clamps Fiberglass Insulation Rope 10 Feet 1.5 Gallon Cold Trap (2QT Tank) Dry Ice, Liquid Nitrogen w/ 2x 1/4" Barb Adapters Distillation Quick Start Guide This guide gives basic quick start instructions for distillation systems. It is intended to provide a starting point for learning the process. Parameters should be adjusted to suit specific needs, Before beginning distillation, ensure the following steps have been taken: Vacuum Pump is in good working order. Pump should be run against dry load to allow internals to warm up. Oil should be clear. Cloudy or dark oil should be changed. All glass components are in good working order and ready to be assembled A winterization and degassing procedure has been done to prepare oil for distillation Once all three of these steps have been completed, you are ready to begin distilling. Begin by placing stir bar in boiling flask and then load your material. This should be done using a funnel. A small amount of alcohol in the oil will give it a thinner consistency making it easier to transfer. Assemble all glassware and ensure each joint is properly greased. Do not use too much, as the vacuum pressure might pull some grease into the system. To ensure a full seal, spread grease in a circular motion by rotating glassware Attach circulator to condenser and set temperature to 50C. Allow circulator to reach temperature before beginning distillation. Connect vacuum pump to manifold. The manifold will allow you to isolate each individual component as well as let atmosphere into and out of the system. Connect receiving cow to cold trap. Connect cold trap to manifold. Connect vacuum gauge to manifold. At this point, ensure all connections are correct. Also ensure receiving cow is positioned to collect the first fraction in the far-left receiving flask. Circulator should be at its set temperature. Turn on vacuum pump to begin process. Turn on heat and set to 60C. Vacuum pump will begin to pull down and temperature will begin to rise. Watch the gauge to monitor vacuum pressure and stability. Start stir slower and increase speed with temperature. Once you are close to 60C, increase the temperature 20 degrees. Continue to raise the heat incrementally in 20-degree steps, increasing the set temperature as you near your set point. Increase temperatures incrementally until you reach 220C. You will see your first fraction somewhere between 180C and 190C or slightly before. This is the “heads” fraction. You will move to your second fraction when you see an increased reaction in the head, a slight color change toward golden, as well as a thickening of distillate. When this fraction hits, allow the distillate to “self-clean” the head for a minute or two then, rotate the cow to the middle receiving flask. Collect your “main body” fraction. You will see temps between 190-220C during this fraction. Continue to increase stirring speed as necessary. Reaction in the head may vary but it should never stop. As fluid level in the boiling flask decreases, increase stir speed. The final “tails” fraction is a mixture of the first and second fractions and should be saved for re-distillation later. Ideally, you want to turn the cow to the final flask before the tails fraction hits. The “tails” fraction has an obvious color change and will be darker than the “main body” fraction. You will see temps between 200-250C during this fraction. As fluid level in the boiling flask decreases even more, set stirring RPM higher (1000+ RPM). You may need to compensate with a bit more heat to finish of the final fraction as well. Once process is complete, stop heat, stop stir, and stop vacuum. Let atmosphere into the system. Be sure to properly store your distillate as exposure to air and light can cause oxidation. *Notice to Customers: All units are inspected for broken glassware or parts before leaving BVV™. If the unit arrives damaged (this does not include minor imperfections or scuffs in glassware), the customer MUST contact BVV™ within 72 hours from carrier delivery to file a claim. If the customer DOES NOT contact BVV™ within 72 hours from carrier delivery, then BVV™ cannot issue any replacement(s) or compensation for the item; a new purchase will need to be made for a replacement. BVV™ is not responsible for the failure of glassware which must be inspected before and after every use because it may eventually develop imperfections or damage through normal usage, mishandling, and stress caused by temperature variations. If an imperfection or damage is noted while inspecting the glassware DO NOT use the glassware because it can fail, which can cause bodily harm or damage to the surrounding area.
$2,200.00
2L Standard Short Path Distillation Turnkey Setup
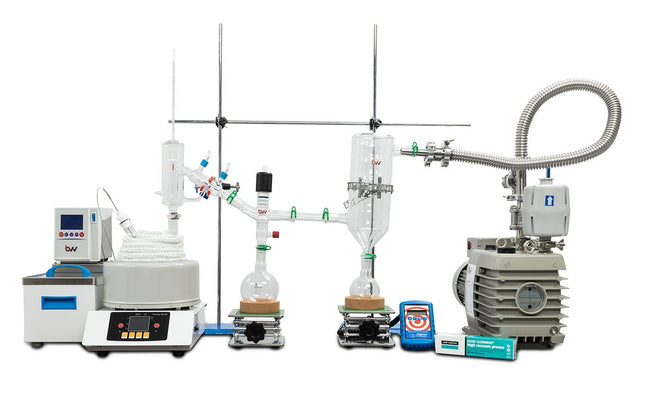
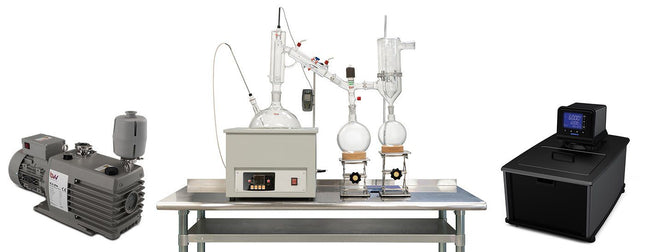
2L Standard Short Path Distillation Turnkey Setup The Standard Distillation Turnkey Setup includes all the components necessary to successfully perform distillation at an entry-level price point. Crossbar pictured is not included. We recommend purchasing multiple lab stands to accommodate your specific needs. The Standard Turnkey Setup Includes: 2L Distillation Kit 1/4" Flare x 1/4" Barb Adapter BVV™ 5L Heated Circulator BVV™ V9D 9CFM Two Stage Vacuum Pump High quality and durable Borosilicate 3.3 glass Vacuum-jacketed distillation adapter 3-way cow adapter, accommodating up to 3 pcs of 500mL flasks GCT-01 cold trap guarding from damage of vapors Kangaroo Traceable Digital Thermometer Flexible Gum Rubber Vacuum Tubing and Silicone Tubing for Flow Distillation Quick Start Guide This guide gives basic quick start instructions for distillation systems. It is intended to provide a starting point for learning the process. Parameters should be adjusted to suit specific needs, Before beginning distillation, ensure the following steps have been taken: Vacuum Pump is in good working order. The pump should be run against the dry load to allow internals to warm up. Oil should be clear. Cloudy or dark oil should be changed. All glass components are in good working order and ready to be assembled A winterization and degassing procedure has been done to prepare oil for distillation Once all three of these steps have been completed, you are ready to begin distilling. Begin by placing stir bar in boiling flask and then load your material. This should be done using a funnel. A small amount of alcohol in the oil will give it a thinner consistency making it easier to transfer. Assemble all glassware and ensure each joint is properly greased. Do not use too much, as the vacuum pressure might pull some grease into the system. To ensure a full seal, spread grease in a circular motion by rotating glassware Attach circulator to condenser and set temperature to 50C. Allow circulator to reach temperature before beginning distillation. Connect vacuum pump to manifold. The manifold will allow you to isolate each individual component as well as let atmosphere into and out of the system. Connect receiving cow to cold trap. Connect cold trap to manifold. Connect vacuum gauge to manifold. At this point, ensure all connections are correct. Also ensure receiving cow is positioned to collect the first fraction in the far-left receiving flask. Circulator should be at its set temperature. Turn on vacuum pump to begin process. Turn on heat and set to 60C. Vacuum pump will begin to pull down and temperature will begin to rise. Watch the gauge to monitor vacuum pressure and stability. Start stir slower and increase speed with temperature. Once you are close to 60C, increase the temperature 20 degrees. Continue to raise the heat incrementally in 20-degree steps, increasing the set temperature as you near your set point. Increase temperatures incrementally until you reach 220C. You will see your first fraction somewhere between 180C and 190C or slightly before. This is the “heads” fraction. You will move to your second fraction when you see an increased reaction in the head, a slight color change toward golden, as well as a thickening of distillate. When this fraction hits, allow the distillate to “self-clean” the head for a minute or two then, rotate the cow to the middle receiving flask. Collect your “main body” fraction. You will see temps between 190-220C during this fraction. Continue to increase stirring speed as necessary. Reaction in the head may vary but it should never stop. As fluid level in the boiling flask decreases, increase stir speed. The final “tails” fraction is a mixture of the first and second fractions and should be saved for re-distillation later. Ideally, you want to turn the cow to the final flask before the tails fraction hits. The “tails” fraction has an obvious color change and will be darker than the “main body” fraction. You will see temps between 200-250C during this fraction. As fluid level in the boiling flask decreases even more, set stirring RPM higher (1000+ RPM). You may need to compensate with a bit more heat to finish of the final fraction as well. Once the process is complete, stop heat, stop stir, and stop vacuum. Let the atmosphere into the system. Be sure to properly store your distillate as exposure to air and light can cause oxidation. ***Note: This entire setup will ship via motor freight.*** *Notice to Customers: All units are inspected for broken glassware or parts before leaving BVV™. If the unit arrives damaged (this does not include minor imperfections or scuffs in glassware), the customer MUST contact BVV™ within 72 hours from carrier delivery to file a claim. If the customer DOES NOT contact BVV™ within 72 hours from carrier delivery, then BVV™ cannot issue any replacement(s) or compensation for the item; a new purchase will need to be made for a replacement. BVV™ is not responsible for the failure of glassware which must be inspected before and after every use because it may eventually develop imperfections or damage through normal usage, mishandling, and stress caused by temperature variations. If an imperfection or damage is noted while inspecting the glassware DO NOT use the glassware because it can fail, which can cause bodily harm or damage to the surrounding area.
$2,600.00
2L Premium Short Path Distillation Turnkey Setup with P2 Distillation Head
2L Premium Short Path Distillation Turnkey Setup with P2 Distillation Head The 2L Premium Distillation Turnkey Setup features our 2L Distillation Kit with P2 Distillation Head and USA made glass. Every component in this turnkey is made for precision, throughput, and repeatable results. Also included is our Pro Series 11.3CFM Corrosion Resistant Two Stage Vacuum Pump giving you extreme power and depth with long lifespan, the Bullseye Precision Vacuum Gauge from Digivac which is the most rugged and dependable vacuum gauge on the market, and a Polyscience 7L MX Heated Circulator for maximum condensation of vapors. You will also receive a Dewar Style Glass Cold Trap to keep all volatiles and solvents out of your vacuum system. This Turnkey Setup gives you everything needed to perform distillation at the highest level. The Premium Turnkey Kit Includes: 2L Distillation Kit w/ P2 Distillation Head KF-25 x 1/4" Barb Adapter Dewar Style Glass Cold Trap Bullseye precision Vacuum Gauge Polyscience 7L MX Heated Circulator Pro Series 14.1CFM Corrosion Resistant Two Stage Vacuum Pump Distillation Quick Start Guide This guide gives basic quick start instructions for distillation systems. It is intended to provide a starting point for learning the process. Parameters should be adjusted to suit specific needs, Before beginning distillation, ensure the following steps have been taken: Vacuum Pump is in good working order. Pump should be run against dry load to allow internals to warm up. Oil should be clear. Cloudy or dark oil should be changed. All glass components are in good working order and ready to be assembled A winterization and degassing procedure has been done to prepare oil for distillation Once all three of these steps have been completed, you are ready to begin distilling. Begin by placing stir bar in boiling flask and then load your material. This should be done using a funnel. A small amount of alcohol in the oil will give it a thinner consistency making it easier to transfer. Assemble all glassware and ensure each joint is properly greased. Do not use too much, as the vacuum pressure might pull some grease into the system. To ensure a full seal, spread grease in a circular motion by rotating glassware Attach circulator to condenser and set temperature to 50C. Allow circulator to reach temperature before beginning distillation. Connect vacuum pump to manifold. The manifold will allow you to isolate each individual component as well as let atmosphere into and out of the system. Connect receiving cow to cold trap. Connect cold trap to manifold. Connect vacuum gauge to manifold. At this point, ensure all connections are correct. Also ensure receiving cow is positioned to collect the first fraction in the far-left receiving flask. Circulator should be at its set temperature. Turn on vacuum pump to begin process. Turn on heat and set to 60C. Vacuum pump will begin to pull down and temperature will begin to rise. Watch the gauge to monitor vacuum pressure and stability. Start stir slower and increase speed with temperature. Once you are close to 60C, increase the temperature 20 degrees. Continue to raise the heat incrementally in 20-degree steps, increasing the set temperature as you near your set point. Increase temperatures incrementally until you reach 220C. You will see your first fraction somewhere between 180C and 190C or slightly before. This is the “heads” fraction. You will move to your second fraction when you see an increased reaction in the head, a slight color change toward golden, as well as a thickening of distillate. When this fraction hits, allow the distillate to “self-clean” the head for a minute or two then, rotate the cow to the middle receiving flask. Collect your “main body” fraction. You will see temps between 190-220C during this fraction. Continue to increase stirring speed as necessary. Reaction in the head may vary but it should never stop. As fluid level in the boiling flask decreases, increase stir speed. The final “tails” fraction is a mixture of the first and second fractions and should be saved for re-distillation later. Ideally, you want to turn the cow to the final flask before the tails fraction hits. The “tails” fraction has an obvious color change and will be darker than the “main body” fraction. You will see temps between 200-250C during this fraction. As fluid level in the boiling flask decreases even more, set stirring RPM higher (1000+ RPM). You may need to compensate with a bit more heat to finish of the final fraction as well. Once the process is complete, stop heat, stop stir, and stop vacuum. Let the atmosphere into the system. Be sure to properly store your distillate as exposure to air and light can cause oxidation. ***Note: This entire setup will ship via motor freight.*** ***Note: All units are inspected for broken glass or parts before unit is shipped. If unit arrives damaged or glass is broken (this does not include minor imperfections or scuffs in glassware), Customer MUST contact BVV™ within 3 days of delivery to file a claim and receive a replacement part. If customer DOES NOT contact BVV™ within 3 days of delivery responsibility for replacement parts falls on the customer and they must pay for replacement pieces.*** ***Glassware Safety Disclaimer: BVV™ is not responsible for failure of glassware which must be inspected before and after every use because it may eventually develop imperfections or damage through normal usage, mishandling, and stress caused by temperature variations. If an imperfection or damage is noted while inspecting the glassware DO NOT use the glassware because it can fail causing bodily harm or damage to the surrounding area.***
$6,000.00 - $7,650.00
5L Premium Short Path Distillation Turnkey Setup
5L Premium Distillation Kit This unit carries a 2 day lead time. The 5L Premium Short Path Distillation Turnkey Setup features our 5L Distillation Kit with P5 Distillation Head and USA made glass. Every component in this turnkey is made for precision, throughput, and repeatable results. Also included is our Pro Series 11.3CFM Corrosion Resistant Two Stage Vacuum Pump giving you extreme power and depth with a long lifespan, the Bullseye Precision Vacuum Gauge from Digivac which is the most rugged and dependable vacuum gauge on the market, and a BVV 19L Heated Circulator for maximum condensation of vapors. You will also receive a Dewar Style Glass Cold Trap to keep all volatiles and solvents out of your vacuum system. This Turnkey Setup gives you everything needed to perform distillation at the highest level. The Premium Short Path Distillation Turnkey Kit Includes: 5L Distillation Kit with P5 Distillation Head KF-25 x 1/4" Barb Adapter Dewar Style Glass Cold Trap Bullseye Precision Vacuum Gauge Polyscience 7L MX Heated Circulator Pro Series 14.1CFM Corrosion Resistant Two Stage Vacuum Pump Short Path Distillation Quick Start Guide This guide gives basic quick start instructions for distillation systems. It is intended to provide a starting point for learning the process. Parameters should be adjusted to suit specific needs, Before beginning distillation, ensure the following steps have been taken: Vacuum Pump is in good working order. Pump should be run against dry load to allow internals to warm up. Oil should be clear. Cloudy or dark oil should be changed. All glass components are in good working order and ready to be assembled A winterization and degassing procedure has been done to prepare oil for distillation Once all three of these steps have been completed, you are ready to begin distilling. Begin by placing stir bar in boiling flask and then load your material. This should be done using a funnel. A small amount of alcohol in the oil will give it a thinner consistency making it easier to transfer. Assemble all glassware and ensure each joint is properly greased. Do not use too much, as the vacuum pressure might pull some grease into the system. To ensure a full seal, spread grease in a circular motion by rotating glassware Attach circulator to condenser and set temperature to 50C. Allow circulator to reach temperature before beginning distillation. Connect vacuum pump to manifold. The manifold will allow you to isolate each individual component as well as let atmosphere into and out of the system. Connect receiving cow to cold trap. Connect cold trap to manifold. Connect vacuum gauge to manifold. At this point, ensure all connections are correct. Also ensure receiving cow is positioned to collect the first fraction in the far-left receiving flask. Circulator should be at its set temperature. Turn on vacuum pump to begin process. Turn on heat and set to 60C. Vacuum pump will begin to pull down and temperature will begin to rise. Watch the gauge to monitor vacuum pressure and stability. Start stir slower and increase speed with temperature. Once you are close to 60C, increase the temperature 20 degrees. Continue to raise the heat incrementally in 20-degree steps, increasing the set temperature as you near your set point. Increase temperatures incrementally until you reach 220C. You will see your first fraction somewhere between 180C and 190C or slightly before. This is the “heads” fraction. You will move to your second fraction when you see an increased reaction in the head, a slight color change toward golden, as well as a thickening of distillate. When this fraction hits, allow the distillate to “self-clean” the head for a minute or two then, rotate the cow to the middle receiving flask. Collect your “main body” fraction. You will see temps between 190-220C during this fraction. Continue to increase stirring speed as necessary. Reaction in the head may vary but it should never stop. As fluid level in the boiling flask decreases, increase stir speed. The final “tails” fraction is a mixture of the first and second fractions and should be saved for re-distillation later. Ideally, you want to turn the cow to the final flask before the tails fraction hits. The “tails” fraction has an obvious color change and will be darker than the “main body” fraction. You will see temps between 200-250C during this fraction. As fluid level in the boiling flask decreases even more, set stirring RPM higher (1000+ RPM). You may need to compensate with a bit more heat to finish of the final fraction as well. Once the process is complete, stop heat, stop stir, and stop vacuum. Let atmosphere into the system. Be sure to properly store your distillate as exposure to air and light can cause oxidation. ***Note: This entire setup will ship via motor freight.*** ***Note: All units are inspected for broken glass or parts before unit is shipped. If unit arrives damaged or glass is broken (this does not include minor imperfections or scuffs in glassware), Customer MUST contact BVV™ within 3 days of delivery to file a claim and receive a replacement part. If customer DOES NOT contact BVV™ within 3 days of delivery responsibility for replacement parts falls on the customer and they must pay for replacement pieces.*** ***Glassware Safety Disclaimer: BVV™ is not responsible for failure of glassware which must be inspected before and after every use because it may eventually develop imperfections or damage through normal usage, mishandling, and stress caused by temperature variations. If an imperfection or damage is noted while inspecting the glassware DO NOT use the glassware because it can fail causing bodily harm or damage to the surrounding area.***
$5,500.00
5L Short Path Distillation Kit with P5 Distillation Head
5L Short Path Distillation Kit with P5 Distillation Head This unit carries a 2 day lead time. The 5L Distillation Kit includes everything needed to perform distillation excluding the vacuum pump and chiller. This kit features our USA made P5 Distillation Head, as well as USA, made glass. This Kit is designed for high volume production with the highest quality components for precise, repeatable results time and again. This Kit Does NOT include a vacuum pump or chiller. Please see the below recommendations for both as well as recommended add-ons. Recommended Vacuum Pumps: Pro Series 11.3CFM Corrosion Resistant Two Stage Vacuum Pump (recommended option) Just Better 6 CFM 2 Stage Deep Vacuum Pump (economy option) Recommended Chillers: Polyscience 7 Liter MX Heated Circulator (economy option) Polyscience 7 Liter Refrigerated Circulator (premium option with chilling capability) Recommended Add-Ons: Glass Dewar Style Cold Trap (recommended cold trap) Bullseye Precision Vacuum Gauge (premium vacuum gauge for measuing depth) CT40 or CT80 Electronic Cold Trap (electronic cold trap, dry ice replacement) J-KEM Digital Vapor Temp Monitor (digital vapor temp monitor with data-logging capabilites) Specifications: Boiling Flask Size: 5L Receiving Flask Size: 2x 500mL, 1000mL Batch Capacity approximate: 1000-2500 grams Run time: 4 to 8 hours dependent upon material composition and throughput Distillation Temperature Range: 140-250C (Do not exceed 250C) Recommended Condenser Temperature: 40-50C This Kit Includes: Glass components: 5L Boiling Flask P5V6 Distillation Head Triple Neck Cow 2x 500mL Receiving Flask 1L Receiving Flask 120mm Glass Funnel Accessories: PTFE Magnetic Stir Bar Retriever 5 Pack of Metal Keck Clips Dow Corning High Vacuum Silicone Grease Tripod Stand 5L Digital Heating and Stirring Mantle 3-Finger Adjustable Clamp 0-77mm 6" x 6" Scissor Jack 500-1000mL Cork Stand 2x 24/40 ChemglassPTFE Thermometer Inlet Adapter 10ft of Gum Rubber Vacuum Hose 10ft of Silicone Chiller Hose 1/4" Vacuum Manifold Traceable Kangaroo Thermometer - Digital 10 Pack of Adjustable Stainless Steel Tubing Clamps Fiberglass Insulation Rope 10 Feet 1.5 Gallon Cold Trap (2QT Tank) Dry Ice, Liquid Nitrogen w/ 2x 1/4" Barb Adapters Distillation Quick Start Guide This guide gives basic quick start instructions for distillation systems. It is intended to provide a starting point for learning the process. Parameters should be adjusted to suit specific needs, Before beginning distillation, ensure the following steps have been taken: Vacuum Pump is in good working order. Pump should be run against dry load to allow internals to warm up. Oil should be clear. Cloudy or dark oil should be changed. All glass components are in good working order and ready to be assembled A winterization and degassing procedure has been done to prepare oil for distillation Once all three of these steps have been completed, you are ready to begin distilling. Begin by placing stir bar in boiling flask and then load your material. This should be done using a funnel. A small amount of alcohol in the oil will give it a thinner consistency making it easier to transfer. Assemble all glassware and ensure each joint is properly greased. Do not use too much, as the vacuum pressure might pull some grease into the system. To ensure a full seal, spread grease in a circular motion by rotating glassware Attach circulator to condenser and set temperature to 50C. Allow circulator to reach temperature before beginning distillation. Connect vacuum pump to manifold. The manifold will allow you to isolate each individual component as well as let atmosphere into and out of the system. Connect receiving cow to cold trap. Connect cold trap to manifold. Connect vacuum gauge to manifold. At this point, ensure all connections are correct. Also ensure receiving cow is positioned to collect the first fraction in the far-left receiving flask. Circulator should be at its set temperature. Turn on vacuum pump to begin process. Turn on heat and set to 60C. Vacuum pump will begin to pull down and temperature will begin to rise. Watch the gauge to monitor vacuum pressure and stability. Start stir slower and increase speed with temperature. Once you are close to 60C, increase the temperature 20 degrees. Continue to raise the heat incrementally in 20-degree steps, increasing the set temperature as you near your set point. Increase temperatures incrementally until you reach 220C. You will see your first fraction somewhere between 180C and 190C or slightly before. This is the “heads” fraction. You will move to your second fraction when you see an increased reaction in the head, a slight color change toward golden, as well as a thickening of distillate. When this fraction hits, allow the distillate to “self-clean” the head for a minute or two then, rotate the cow to the middle receiving flask. Collect your “main body” fraction. You will see temps between 190-220C during this fraction. Continue to increase stirring speed as necessary. Reaction in the head may vary but it should never stop. As fluid level in the boiling flask decreases, increase stir speed. The final “tails” fraction is a mixture of the first and second fractions and should be saved for re-distillation later. Ideally, you want to turn the cow to the final flask before the tails fraction hits. The “tails” fraction has an obvious color change and will be darker than the “main body” fraction. You will see temps between 200-250C during this fraction. As fluid level in the boiling flask decreases even more, set stirring RPM higher (1000+ RPM). You may need to compensate with a bit more heat to finish of the final fraction as well. Once process is complete, stop heat, stop stir, and stop vacuum. Let atmosphere into the system. Be sure to properly store your distillate as exposure to air and light can cause oxidation. *Notice to Customers: All units are inspected for broken glassware or parts before leaving BVV™. If the unit arrives damaged (this does not include minor imperfections or scuffs in glassware), the customer MUST contact BVV™ within 72 hours from carrier delivery to file a claim. If the customer DOES NOT contact BVV™ within 72 hours from carrier delivery, then BVV™ cannot issue any replacement(s) or compensation for the item; a new purchase will need to be made for a replacement. BVV™ is not responsible for the failure of glassware which must be inspected before and after every use because it may eventually develop imperfections or damage through normal usage, mishandling, and stress caused by temperature variations. If an imperfection or damage is noted while inspecting the glassware DO NOT use the glassware because it can fail, which can cause bodily harm or damage to the surrounding area.
$2,200.00
10L Premium Short Path Distillation Turnkey System
10L Premium Short Path Distillation Turnkey System This unit carries a 2 day lead time. (Note: Stainless Steel Table NOT Included.) The 10L Premium Short Path Distillation Turnkey System features our USA made P10 Distillation Head. Every component in this turnkey is made for precision, throughput, and repeatable results. Also included the Kangaroo digital thermometer which is very rugged and reliable. You will also receive a Ribbed Dewar Style Glass Cold Trap to keep all volatiles and solvents out of your vacuum system. This Turnkey Setup gives you everything needed to perform distillation at the highest level. The 10L Neo Kit Includes: 10L Short Path Distillation Kit including glassware, labware, and P10 Distillation Head. 10L Digital Heating and Stirring Mantle. Polyscience 15 Liter Advanced Digital Heated Circulator BVV™ 21.2CFM Pro Series Corrosion Resistant Vacuum Pump Valved Vacuum Adapter. Ribbed Dewar Style Glass Cold Trap. Kangaroo Digital Thermometer. Distillation Quick Start Guide This guide gives basic quick start instructions for distillation systems. It is intended to provide a starting point for learning the process. Parameters should be adjusted to suit specific needs, Before beginning distillation, ensure the following steps have been taken: Vacuum Pump is in good working order. Pump should be run against dry load to allow internals to warm up. Oil should be clear. Cloudy or dark oil should be changed. All glass components are in good working order and ready to be assembled A winterization and degassing procedure has been done to prepare oil for distillation Once all three of these steps have been completed, you are ready to begin distilling. Begin by placing stir bar in boiling flask and then load your material. This should be done using a funnel. A small amount of alcohol in the oil will give it a thinner consistency making it easier to transfer. Assemble all glassware and ensure each joint is properly greased. Do not use too much, as the vacuum pressure might pull some grease into the system. To ensure a full seal, spread grease in a circular motion by rotating glassware Attach circulator to condenser and set temperature to 50C. Allow circulator to reach temperature before beginning distillation. Connect vacuum pump to manifold. The manifold will allow you to isolate each individual component as well as let atmosphere into and out of the system. Connect receiving cow to cold trap. Connect cold trap to manifold. Connect vacuum gauge to manifold. At this point, ensure all connections are correct. Also ensure receiving cow is positioned to collect the first fraction in the far-left receiving flask. Circulator should be at its set temperature. Turn on vacuum pump to begin process. Turn on heat and set to 60C. Vacuum pump will begin to pull down and temperature will begin to rise. Watch the gauge to monitor vacuum pressure and stability. Start stir slower and increase speed with temperature. Once you are close to 60C, increase the temperature 20 degrees. Continue to raise the heat incrementally in 20-degree steps, increasing the set temperature as you near your set point. Increase temperatures incrementally until you reach 220C. You will see your first fraction somewhere between 180C and 190C or slightly before. This is the “heads” fraction. You will move to your second fraction when you see an increased reaction in the head, a slight color change toward golden, as well as a thickening of distillate. When this fraction hits, allow the distillate to “self-clean” the head for a minute or two then, rotate the cow to the middle receiving flask. Collect your “main body” fraction. You will see temps between 190-220C during this fraction. Continue to increase stirring speed as necessary. Reaction in the head may vary but it should never stop. As fluid level in the boiling flask decreases, increase stir speed. The final “tails” fraction is a mixture of the first and second fractions and should be saved for re-distillation later. Ideally, you want to turn the cow to the final flask before the tails fraction hits. The “tails” fraction has an obvious color change and will be darker than the “main body” fraction. You will see temps between 200-250C during this fraction. As fluid level in the boiling flask decreases even more, set stirring RPM higher (1000+ RPM). You may need to compensate with a bit more heat to finish of the final fraction as well. Once process is complete, stop heat, stop stir, and stop vacuum. Let atmosphere into the system. Be sure to properly store your distillate as exposure to air and light can cause oxidation. ***Note: This entire setup will ship via motor freight.*** ***Note: All units are inspected for broken glass or parts before unit is shipped. If unit arrives damaged or glass is broken (this does not include minor imperfections or scuffs in glassware), Customer MUST contact BVV™ within 3 days of delivery to file a claim and receive a replacement part. If customer DOES NOT contact BVV™ within 3 days of delivery responsibility for replacement parts falls on the customer and they must pay for replacement pieces.*** ***Glassware Safety Disclaimer: BVV™ is not responsible for failure of glassware which must be inspected before and after every use because it may eventually develop imperfections or damage through normal usage, mishandling, and stress caused by temperature variations. If an imperfection or damage is noted while inspecting the glassware DO NOT use the glassware because it can fail causing bodily harm or damage to the surrounding area.***
$11,500.00
10L Premium Short Path Distillation Kit with P10 Distillation Head
10L Short Path Distillation Kit with P10 Distillation Head This unit carries a 2 day lead time. (Note: Stainless Steel Table NOT Included.) The 10L Short Path Distillation Kit features our USA made P10 Distillation Head. Every component in this turnkey is made for precision, throughput, and repeatable results. Also included the Kangaroo digital thermometer which is very rugged and reliable. You will also receive a Ribbed Dewar Style Glass Cold Trap to keep all volatiles and solvents out of your vacuum system. This Kit gives you the basic necessities of a short path distillation system and allows you to add on a temperature control system and vacuum pump to fit your needs. The 10L Neo Kit Includes: 10L Short Path Distillation Kit including glassware, labware, and P10 Distillation Head. 10L Digital Heating and Stirring Mantle. Valved Vacuum Adapter. Ribbed Dewar Style Glass Cold Trap. Kangaroo Digital Thermometer. Distillation Quick Start Guide This guide gives basic quick start instructions for distillation systems. It is intended to provide a starting point for learning the process. Parameters should be adjusted to suit specific needs, Before beginning distillation, ensure the following steps have been taken: Vacuum Pump is in good working order. Pump should be run against dry load to allow internals to warm up. Oil should be clear. Cloudy or dark oil should be changed. All glass components are in good working order and ready to be assembled A winterization and degassing procedure has been done to prepare oil for distillation Once all three of these steps have been completed, you are ready to begin distilling. Begin by placing stir bar in boiling flask and then load your material. This should be done using a funnel. A small amount of alcohol in the oil will give it a thinner consistency making it easier to transfer. Assemble all glassware and ensure each joint is properly greased. Do not use too much, as the vacuum pressure might pull some grease into the system. To ensure a full seal, spread grease in a circular motion by rotating glassware Attach circulator to condenser and set temperature to 50C. Allow circulator to reach temperature before beginning distillation. Connect vacuum pump to manifold. The manifold will allow you to isolate each individual component as well as let atmosphere into and out of the system. Connect receiving cow to cold trap. Connect cold trap to manifold. Connect vacuum gauge to manifold. At this point, ensure all connections are correct. Also ensure receiving cow is positioned to collect the first fraction in the far-left receiving flask. Circulator should be at its set temperature. Turn on vacuum pump to begin process. Turn on heat and set to 60C. Vacuum pump will begin to pull down and temperature will begin to rise. Watch the gauge to monitor vacuum pressure and stability. Start stir slower and increase speed with temperature. Once you are close to 60C, increase the temperature 20 degrees. Continue to raise the heat incrementally in 20-degree steps, increasing the set temperature as you near your set point. Increase temperatures incrementally until you reach 220C. You will see your first fraction somewhere between 180C and 190C or slightly before. This is the “heads” fraction. You will move to your second fraction when you see an increased reaction in the head, a slight color change toward golden, as well as a thickening of distillate. When this fraction hits, allow the distillate to “self-clean” the head for a minute or two then, rotate the cow to the middle receiving flask. Collect your “main body” fraction. You will see temps between 190-220C during this fraction. Continue to increase stirring speed as necessary. Reaction in the head may vary but it should never stop. As fluid level in the boiling flask decreases, increase stir speed. The final “tails” fraction is a mixture of the first and second fractions and should be saved for re-distillation later. Ideally, you want to turn the cow to the final flask before the tails fraction hits. The “tails” fraction has an obvious color change and will be darker than the “main body” fraction. You will see temps between 200-250C during this fraction. As fluid level in the boiling flask decreases even more, set stirring RPM higher (1000+ RPM). You may need to compensate with a bit more heat to finish of the final fraction as well. Once process is complete, stop heat, stop stir, and stop vacuum. Let atmosphere into the system. Be sure to properly store your distillate as exposure to air and light can cause oxidation. ***Note: This entire setup will ship via motor freight.*** *Notice to Customers: All units are inspected for broken glassware or parts before leaving BVV™. If the unit arrives damaged (this does not include minor imperfections or scuffs in glassware), the customer MUST contact BVV™ within 72 hours from carrier delivery to file a claim. If the customer DOES NOT contact BVV™ within 72 hours from carrier delivery, then BVV™ cannot issue any replacement(s) or compensation for the item; a new purchase will need to be made for a replacement. BVV™ is not responsible for the failure of glassware which must be inspected before and after every use because it may eventually develop imperfections or damage through normal usage, mishandling, and stress caused by temperature variations. If an imperfection or damage is noted while inspecting the glassware DO NOT use the glassware because it can fail, which can cause bodily harm or damage to the surrounding area.
$4,100.00
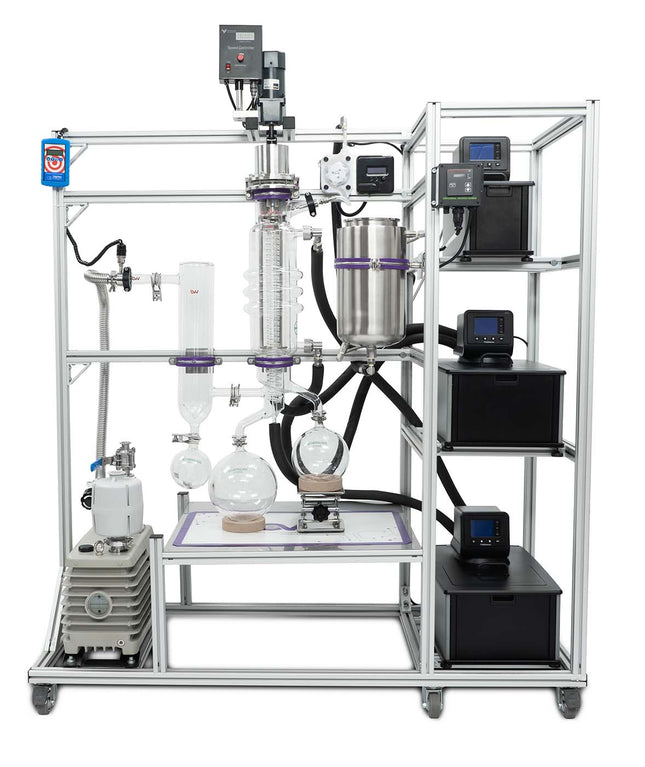
4" Wiped Film Evaporator (WFE) Distillation Turn Key System - USA MADE
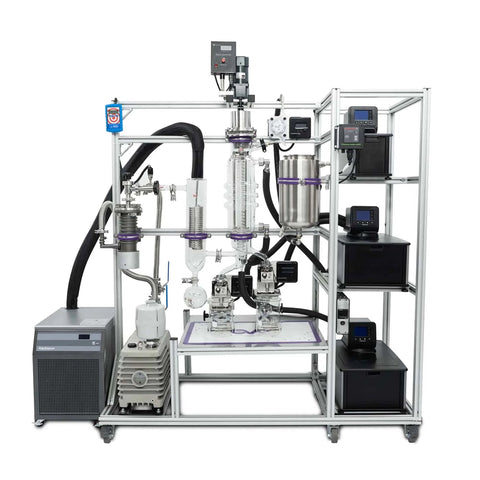
4" BVV Wiped Film Evaporator This system has a 1-2 week lead time. The BVV™ 4" Wiped Film Evaporator (WFE) is a full turnkey distillation kit that will will allow anyone to run a molecular distillation. With the magnetically driven wiper and high vacuum seals this system is able to achieve vacuum levels below 10 mtorr. The system has multiple temperature control apparatuses that allow the user to dial in specific settings that works best for their application. The maximum operating temperature of the outer jacket is 200°C with the standard circulators shown below. The maximum feed rate is up to 7LPH. On average, you can expect to flow 500-1000ml per hour. All heated circulators can be tailored to your specific needs, just ask our team of experienced account representatives! The temperature controlled circulators will need thermal fluid that corresponds with the temperatures needed. Click here to browse fluids. For a full list of ancillary equipment included in the kits please see the table below: KIT Part of System Component Electrical Requirements (V / Ph / A) WFE04-TK-01 Standard Model Wiper Assembly BVV™ Stirring motor 120V / 1Φ Vacuum System BVV™ Pro Series 35.3CFM Rotary Vane Vacuum Pump* DigiVac Bullseye Precision Vacuum Gauge 220V / 3Φ AA Batteries (4x) Temperature Controlled Circulators Polyscience 7L Polyscience 15L (2x) 120V / 1Φ / 10A 220V / 1Φ / 10A Injection Beaker and Wrench 7LPH Peristaltic Heated Hose 120V / 1Φ 120V / 1Φ WFE04-TK-02 Upgraded Vacuum System Upgraded Cold Trap Wiper Assembly BVV™ Stirring motor 120V / 1Φ Vacuum System BVV™ Pro Series 35.3CFM Rotary Vane Vacuum Pump* Summit Research Diffusion Pump (SR-DP04A)** DigiVac Bullseye Precision Vacuum Gauge 220V / 3Φ 180/264V / 1Φ / 10.5A AA Batteries (4x) Temperature Controlled Circulators Polyscience 7L Polyscience 15L (2x) 120V / 1Φ / 10A 220V / 1Φ / 10A Injection Beaker and Wrench 7LPH Peristaltic Heated Hose 120V / 1Φ 120V / 1Φ Cold Trap Polyscience IP100 120V / 1Φ / 11.5A WFE04-TK-03 Upgraded Vacuum System Upgraded Cold Trap Outlet Pumps Wiper Assembly BVV™ Stirring motor 120V / 1Φ Vacuum System BVV™ Pro Series 35.3CFM Rotary Vane Vacuum Pump* Summit Research Diffusion Pump (SR-DP04A)** DigiVac Bullseye Precision Vacuum Gauge 220V / 3Φ 180/264V / 1Φ / 10.5A AA Batteries (4x) Temperature Controlled Circulators Polyscience 7L Polyscience 15L (2x) 120V / 1Φ / 10A 220V / 1Φ / 10A Injection Beaker and Wrench 7LPH Peristaltic Heated Hose 120V / 1Φ 120V / 1Φ Cold Trap Polyscience IP100 120V / 1Φ / 11.5A Outlet Pumps Beaker and Wrench Gear Pump (2x) Beaker and Wrench Heat Pad PID Controller 120V / 1Φ 120V / 1Φ Notes: *The Rotary vane vacuum pump paired with this kit uses 3Φ power, a smaller single phase pump can be substituted if needed. Substitution will have an impact the performance versus the standard unit. **The Summit Research diffusion pump must be water cooled, if facility water cooling is not an option an additional chiller may be needed, a Polyscience 1HP Durachill is recommended. An air cooled diffusion pump can be provided as a substitute. Substitution will have an impact the performance versus the standard unit.
$45,000.00 - $76,000.00
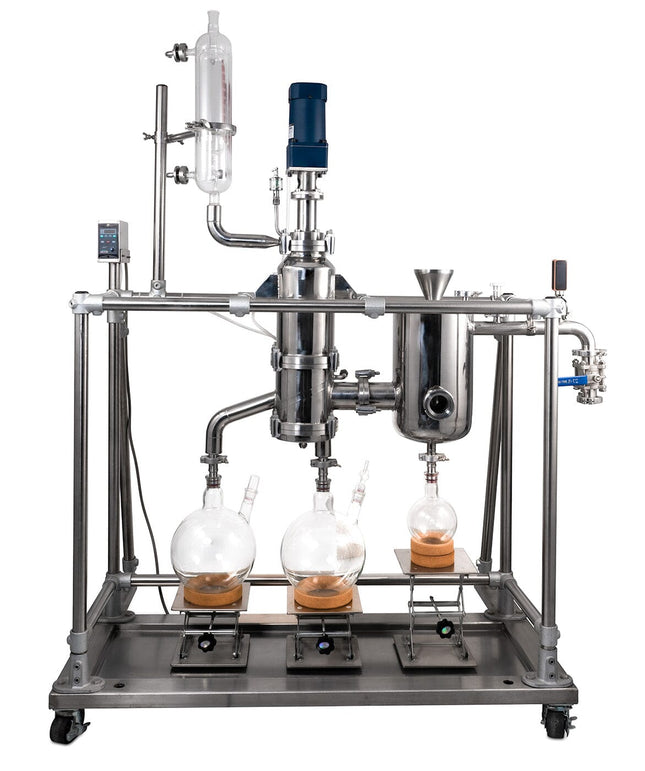
TOPTION Wipe Film
TOPTION Wipe Film This wiped film is a complete distillation unit. It will need heaters and a vacuum system to be a full turn key setup. The heater hookups for injection and attached armatures are all 12mm hose barbs. For the main wiper body there are 20mm tube stubs. The built in cold trap uses dry ice which can be input through the funnel. We have included a digital vacuum gauge along with an extra injection chamber and an extra 5L flask.
$10,000.00
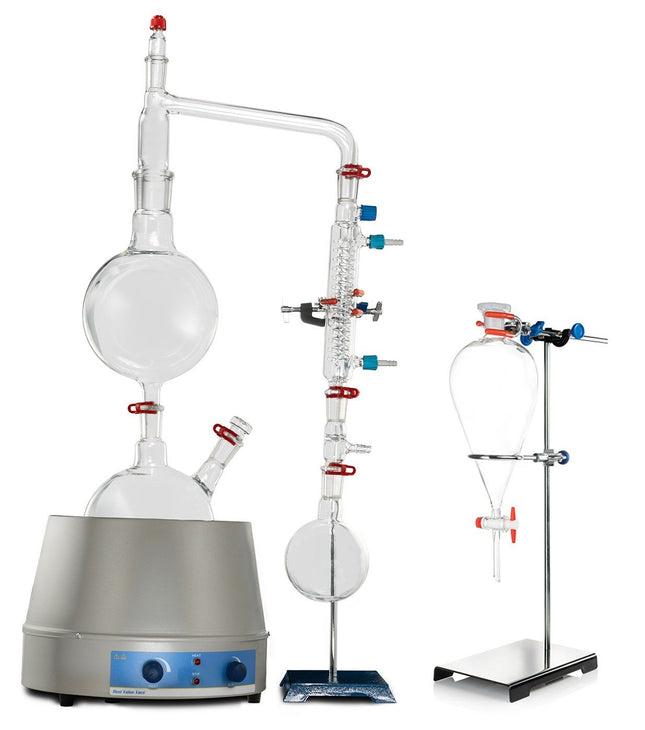
Steam Distillation Kit
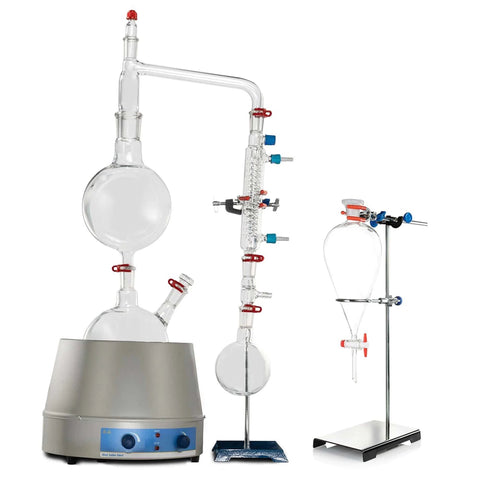
Steam Distillation Steam distillation is the separation of organic compounds at low temperatures by boiling water. It is widely used for essential oils and terpenes because it does not degrade the organic material as a traditional fractional distillation does. Alternatively, steam distillation can extract a diverse array of immiscible substances. You can use steam distillation for “steam stripping” in petroleum refineries and separate commercially important organic compounds, including fatty acids. Our system is composed of a 6-piece glass distillation set up paired with a separatory funnel. Simply fill the boiling flask with water and the material flask with your organic material, then use the heating mantle to boil the water and pass the steam through the material flask. There is a port above the material flask on the U-Tube to insert a thermometer to more closely monitor the process. The steam passing around the material will lower the boiling point on the surface of the plant material and cause the terpenes to boil off at low temperatures. After moving through the U-Tube the steam and terpenes will condense in the graham condenser and drain into the flask below. After filling the flask, simply swap it and drain the contents into the separatory funnel to remove all water. Steam Distillation is beneficial due to the lower boiling point being able to reduce the decomposition of temperature-sensitive compounds. Here’s a look at the key benefits of steam distillation. Key Benefits of Steam Distillation: Streamlined method produces organic solvent-free products Possesses large capacity for processing at the industrial scale Requires no subsequent separation steps Requires less fuel for the steam boiler for extraction of oils Due to its wide application and inexpensive equipment, steam distillation can be a cost-effective investment Kit Includes: 2L Analog Mantle 2L Boiling Flask 2L Material Flask U-Tube 24/40 Thermometer Adapter 24/40 Male Stopper Graham Condenser 500ml Flask 500ml Separatory Funnel BVV™ Lab Stand Three Finger Clamp Boss Head Please Note: for any replacement parts, please contact us. 2L Dual Neck Flask (SKU: STEAM-01-2000ml) 2L Material Flask (SKU: STEAM-02) U-Tube (SKU: STEAM-03) Graham Condenser (SKU: STEAM-04)
$495.00
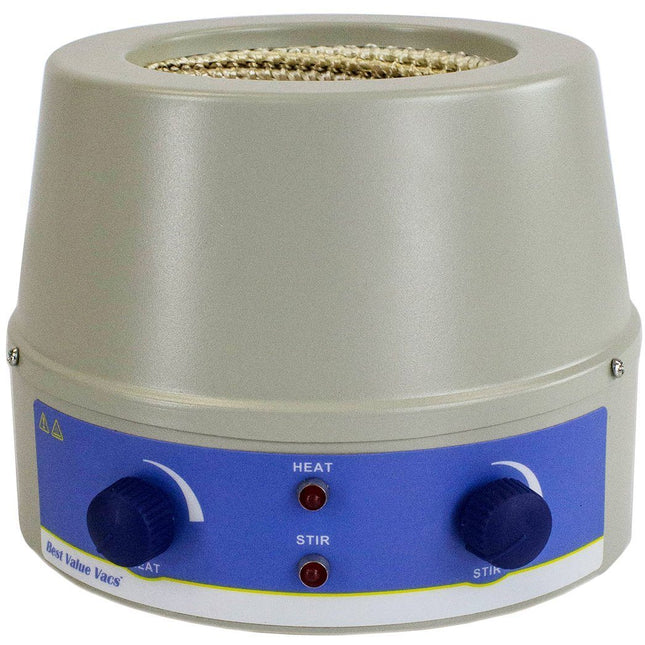
Analog Heating and Stirring Mantle
Analog Heating and Stirring Mantle is used to heat up a glass round bottom flask and stir the contents inside. Heating and stirring functions are analog and sizes range from 500ml to 2000ml. (Mantle's are tested in house and may show slight discoloration on the heating surface.) Certifications: CE Approval Warranties: 500ml - 30 Day Limited Warranty 1000/2000ml - 90 Day Limited Warranty.
$135.00 - $175.00
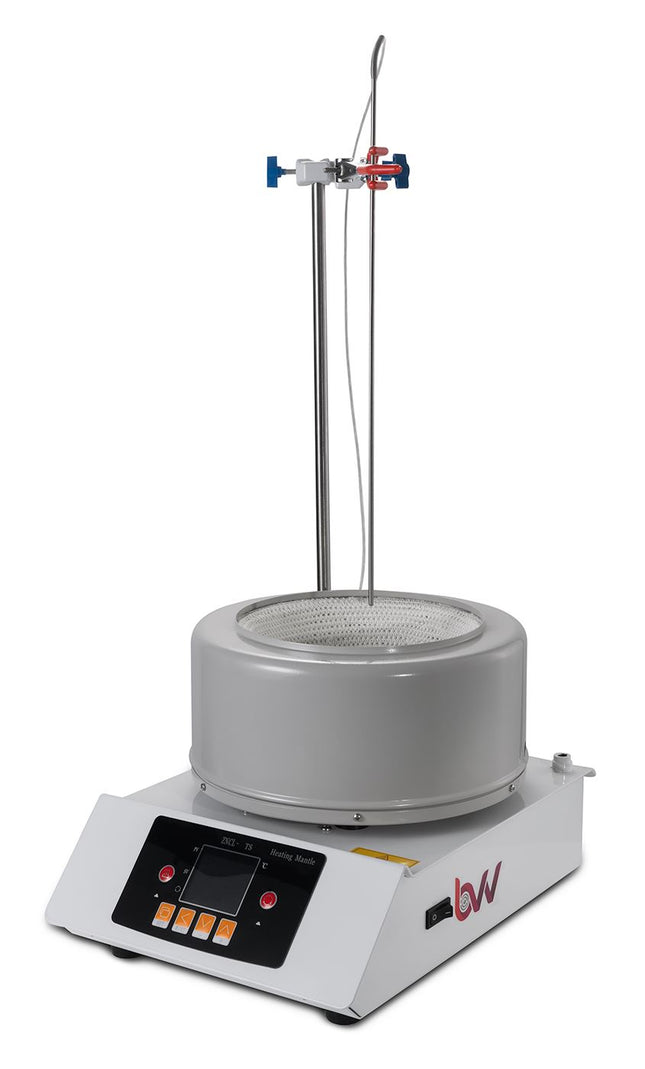
2L Digital Heating and Stirring Mantle
2L Digital Heating and Stirring Mantle Digital Heating and Stirring Mantles give the operator the most precise temperatures and readouts during distillations. These mantles autotune to specific user input to provide consistent results. Each mantle is equipped with large digital display that will give you readouts for both set temperature, actual temperature, and stirring speed. Each mantle also comes with a vertical brace bar and boss head as well as a temperature probe which plugs directly into the mantle. For first time use, the mantle should have an initial burn out done. This will burn off any residual oils used in the production of the insulation rope. Specifications: Capacity: 2L (2000mL) Power Supply: 110V 60Hz Adjustable Rotation Speed: 50-1800 RPM Motor Power: 40W, DC14-24V Heating Power 180-2200W Temperature Control Accuracy: +/- 1C Intelligent Temperature Control: Yes Temperature Range: RT+10-380C Insulation Material: Alkali-free Glass Fiber, temperature resistant up to 450C Shipping Dimensions: 20 x 14 x 13 in. Weight: 8 lbs
$670.00

5L Digital Heating and Stirring Mantle
5L Digital Heating and Stirring Mantle Digital Heating and Stirring Mantles give the operator the most precise temperatures and readouts during distillations. These mantles autotune to specific user input to provide consistent results. Each mantle is equipped with large digital display that will give you readouts for both set temperature, actual temperature, and stirring speed. Each mantle also comes with a vertical brace bar and boss head as well as a temperature probe which plugs directly into the mantle. For first time use, the mantle should have an initial burn out done. This will burn off any residual oils used in the production of the insulation rope. Features: PID Temperature control Brushless magnetic magnetic stirrer motor Temperature protector Specifications: Capacity: 5L (5000mL) Power Supply: 110V 60Hz Adjustable Rotation Speed: 50-1800 RPM Motor Power: 40W, DC14-24V Heating Power 180-2200W Temperature Control Accuracy: +/- 1C Intelligent Temperature Control: Yes Temperature Range: RT+10-380C Insulation Material: Alkali-free Glass Fiber, temperature resistant up to 450C Shipping Dimensions: 20 x 15 x 14 in. Weight: 12 lbs
$950.00
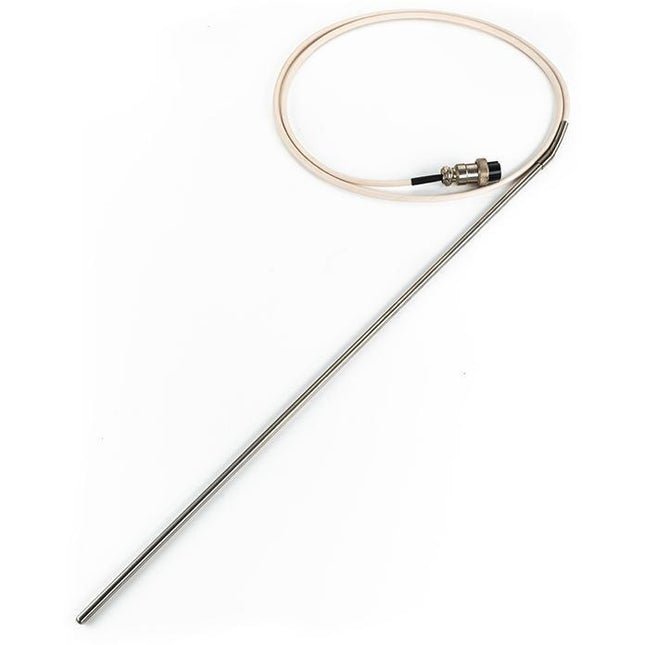
BVV™ 5L Digital Heating Mantle Probe
BVV™ 5L Digital Heating Mantle Probe This is a replacement probe for the BVV™ 5L Digital Heating Mantle. the probe measures 15.5" in length with an overall length of 60.5"
$98.00
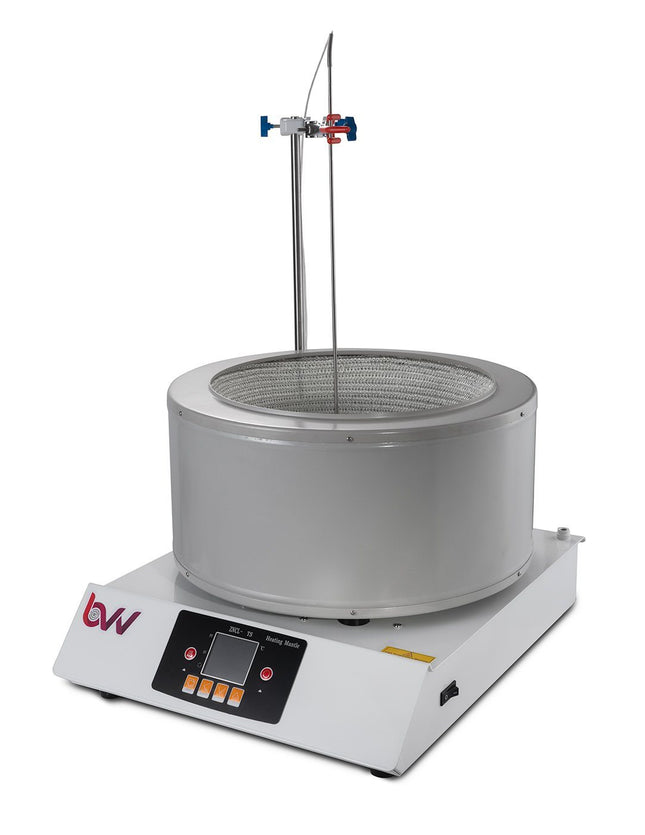
10L Digital Heating and Stirring Mantle
10L Digital Heating and Stirring Mantle Digital Heating and Stirring Mantles give the operator the most precise temperatures and readouts during distillations. These mantles autotune to specific user input to provide consistent results. Each mantle is equipped with large digital display that will give you readouts for both set temperature, actual temperature, and stirring speed. Each mantle also comes with a vertical brace bar and boss head as well as a temperature probe which plugs directly into the mantle. For first time use, the mantle should have an initial burn out done. This will burn off any residual oils used in the production of the insulation rope. Specifications Capacity: 10L (10000mL) Power Supply: 220V 60Hz Adjustable Rotation Speed: 50-1800 RPM Motor Power: 40W, DC14-24V Heating Power 180-2200W Temperature Control Accuracy: +/- 1C Intelligent Temperature Control: Yes Temperature Range: RT+10-380C Insulation Material: Alkali-free Glass Fiber, temperature resistant up to 450C Shipping Dimensions: 23 x 23 x 16 in. Weight: 20 lbs
$1,150.00
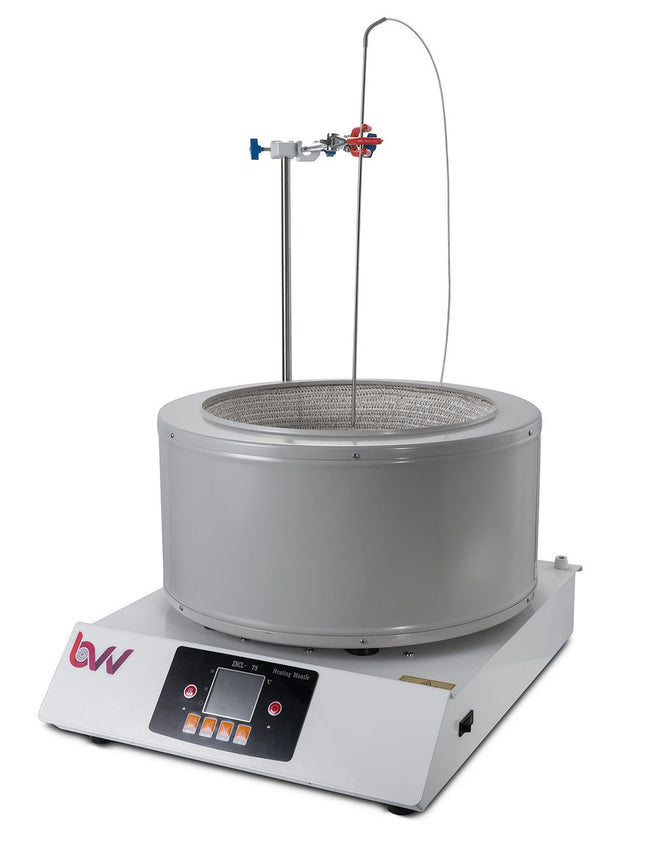
20L Digital Heating Mantle
20L DIGITAL HEATING AND STIRRING MANTLE Digital Heating and Stirring Mantles give the operator the most precise temperatures and readouts during distillations. These mantles autotune to specific user input to provide consistent results. Each mantle is equipped with large digital display that will give you readouts for both set temperature, actual temperature, and stirring speed. Each mantle also comes with a vertical brace bar and boss head as well as a temperature probe which plugs directly into the mantle. For first time use, the mantle should have an initial burn out done. This will burn off any residual oils used in the production of the insulation rope. Specifications: Capacity: 20L (20000mL) Power Supply: 220V 60Hz Adjustable Rotation Speed: 50-1800 RPM Motor Power: 40W, DC14-24V Heating Power 180-2200W Temperature Control Accuracy: +/- 1C Intelligent Temperature Control: Yes Temperature Range: RT+10-380C Insulation Material: Alkali-free Glass Fiber, temperature resistant up to 450C Shipping Dimensions: 25 x 25 x 18 in. Weight: 35 lbs
$1,550.00
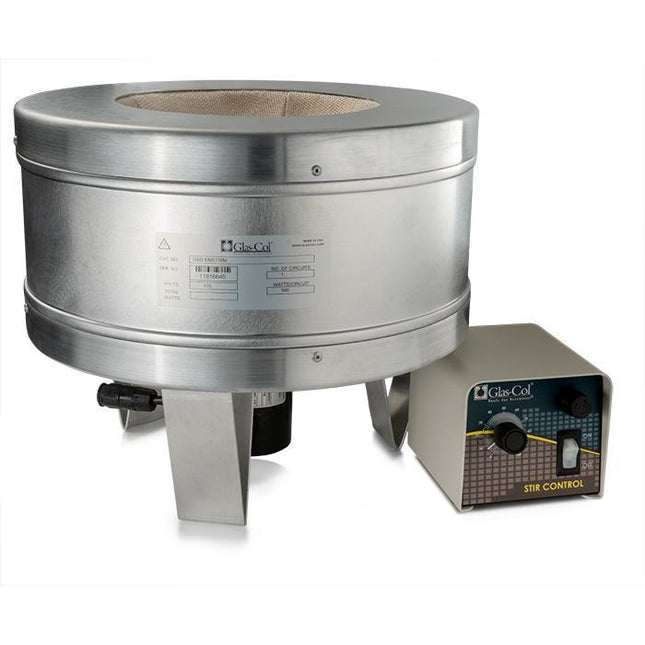
Glas-Col Stirmantle
Glas-Col Stirmantle Glas-Col offers two types of StirMantles: Electromagnetic (50 to 750 rpm) and Motor Driven (100 to 1850 rpm). The maximum rpms available for each type depends on the viscosity of the solution being heated. Electromagnetic StirMantles are typically used with aqueous solutions like water, while the Motor Driven units use a powerful magnet for higher viscous solution like oils. StirMantles withstands 400°C internal operating temperature. EMS series include the heating mantle, speed control and stir-bar. TEM series only includes the heating mantle and allows the customer in select different speed control options or combined speed/temperature packages like the 104A HS112. WARNING: chemical spillage, overheating, overloading, and general misuse will greatly reduce service life! Note: The temperature probe this mantle comes with can only be used with a thermowell. If you are using it with BVV™ glassware you will need to add SKU: TK1/4-12 or TK1/4-18 depending on what mantle size is selected.
$1,000.00 - $1,450.00
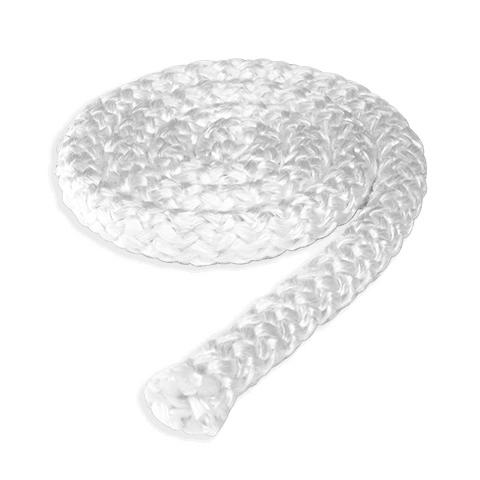
Fiberglass Insulation Rope 10 Feet
Fiberglass Insulation Rope 10 Feet ***Caution: Always use proper protection when working with fiberglass. Avoid skin and eye contact.*** Ten feet of white 1/2" fiberglass insulation rope. Used to wrap the upper half of boiling flasks. Specifications: Width: 1/2" Material: Fiberglass Maximum Temperature: 1000F Resistant to solvents, acids, and bleach Color: White Length: 10 ft. (20ft needed for 5L Flask.)
$28.00
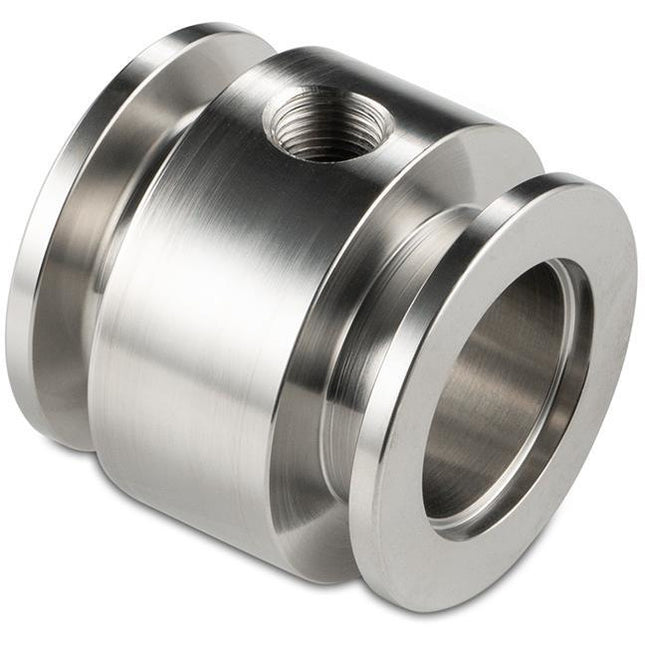
KF-25 x KF-25 x 1/8" FNPT Adapter
KF-25 x KF-25 x 1/8" FNPT Adapter This 304 stainless steel KF-25 adapter is specifically designed for adapting Digivac Bullseye Precision Vacuum Gauges to systems with reducing and minimizing connect / leak points on the system.
$27.00
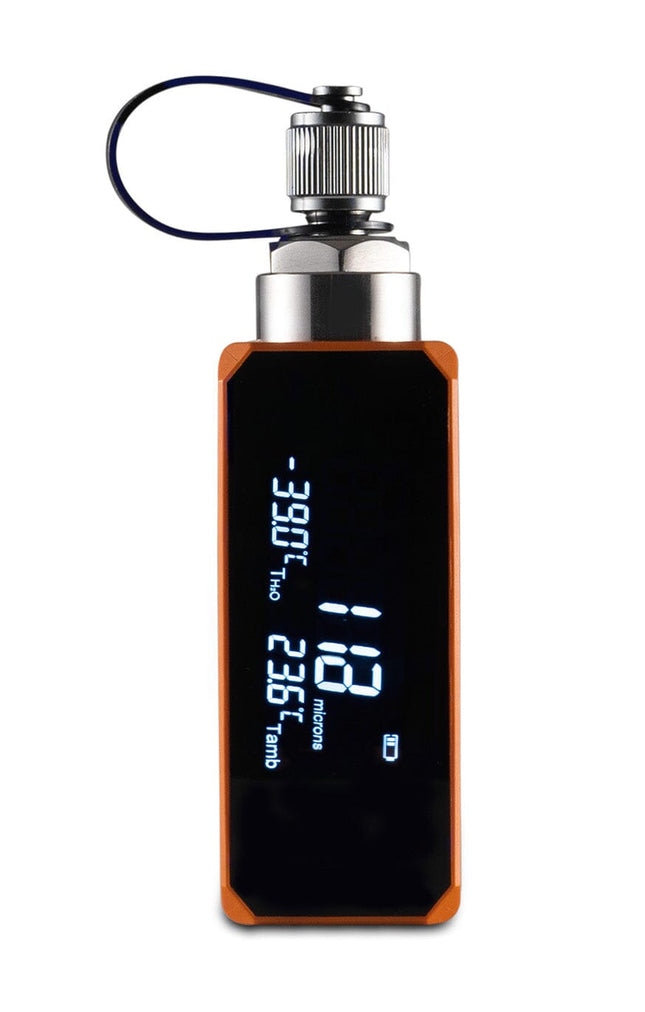
Wireless Digital Vacuum Gauge 1~19,000 Microns
VGW-mini Wireless micron vacuum gauge measures vacuum via just one service port and with no loss of refrigerant. Its compact, robust and smart design support HVAC technicians with numerous intelligent features like the graphic display of measurement data in the Elitech Tools App. Its smart Bluetooth integration allows for data to be stored and evaluated reliably and efficiently, thus saving precious time and resources. Product Features High Accuracy The digital vacuum gauge achieves precise deep vacuum measurements down to single digit resolutions and provides notifications when the evacuation target is met. Smart APP Control Control your micron tester remotely and navigate through all measurement data via Smartphone or Tablet. Quickly and conveniently document your job, finalize your report and export - directly from the job site. Intelligent Judgement of H2O Status The vacuum meter automatically judges physical state of H2O by comparing ambient temperature and water saturation temperature corresponding to the vacuum in the system. Large, Easy-to-Read Display Continual digital readout of evacuation process can be viewed easily on the large, full-view LCD screen. Rechargeable Lithium Battery Built-in rechargeable lithium battery can work up to 20 hours per single full charge, saving troubles of frequent battery change. Product Specifications Measuring Range: 0-19000 micron Operating Temperature: -4℉~140℉ (-20°C~60°C) Interface: 1/4 SAE Accuracy: 1~10,000 microns: ±10% of readings ±10 microns10,000~19,000 microns: ±20% of readings Resolution: 0-400 1 Micron400-3000 10 Micron3000-10000 100 Micron10000-19000 250 Micron Vacuum Units microns, mTorr, in/hg, Pa, Torr, KPa, mbar and psia Battery rechargeable lithium battery (1,000mAh) Overload 27.5 bar Certification CE
$170.00
Flat Bottom Flask
Flat Bottom Flask Flat Bottom Flasks are used to capture and store material when used with a glass funnel. These flasks are flat bottomed and come with a non-jointed opening. Sizes Available: 500ml 1000ml *Notice to customers: All units are inspected for broken glassware or parts before leaving BVV™. If the unit arrives damaged (this does not include minor imperfections or scuffs in glassware), the customer MUST contact BVV™ within 72 hours from carrier delivery to file a claim. If the customer DOES NOT contact BVV™ within 72 hours from carrier delivery, then BVV™ cannot issue any replacement(s) or compensation for the item; a new purchase will need to be made for a replacement. **Glassware Safety Disclaimer: BVV™ is not responsible for failure of glassware which must be inspected before and after every use because it may eventually develop imperfections or damage through normal usage, mishandling, and stress caused by temperature variations. If an imperfection or damage is noted while inspecting the glassware DO NOT use the glassware because it can fail causing bodily harm or damage to the surrounding area.**
$15.00 - $17.00
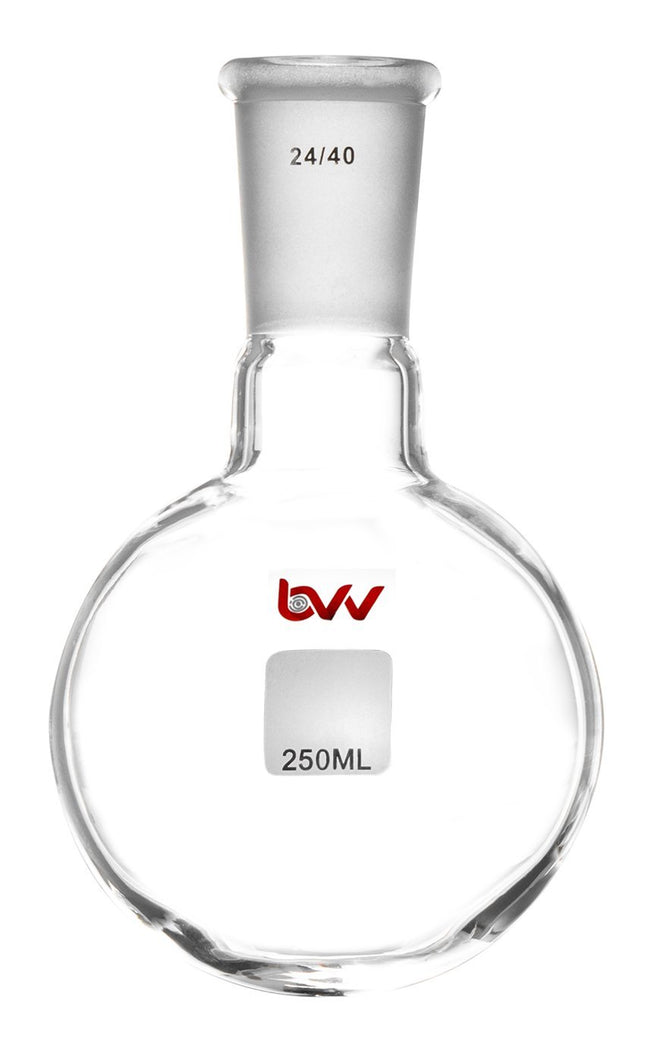
Single Neck Round Bottom Flask
Single Neck Round Bottom Flask Single neck round bottom flasks can be used for a variety of applications such as capturing and collecting material and also used for boiling off material through distillation. These flasks are single neck with a ground 24/40 joint and require the application of vacuum grease to the ground surface when using the flasks in a vacuum application. When laying these flasks down it is always recommended to use a cork stand for the flask to prevent breakage and keep the flask upright. Sizes Available: 50ml - 24/40 Ground Joint 100ml - 24/40 Ground Joint 125ml - 24/40 Ground Joint 250ml - 24/40 Ground Joint 500ml - 24/40 Ground Joint 1000ml - 24/40 Ground Joint 2000ml - 24/40 Ground Joint *Notice to customers: All units are inspected for broken glassware or parts before leaving BVV™. If the unit arrives damaged (this does not include minor imperfections or scuffs in glassware), the customer MUST contact BVV™ within 72 hours from carrier delivery to file a claim. If the customer DOES NOT contact BVV™ within 72 hours from carrier delivery, then BVV™ cannot issue any replacement(s) or compensation for the item; a new purchase will need to be made for a replacement. **Glassware Safety Disclaimer: BVV™ is not responsible for failure of glassware which must be inspected before and after every use because it may eventually develop imperfections or damage through normal usage, mishandling, and stress caused by temperature variations. If an imperfection or damage is noted while inspecting the glassware DO NOT use the glassware because it can fail causing bodily harm or damage to the surrounding area.**
$5.00 - $38.00
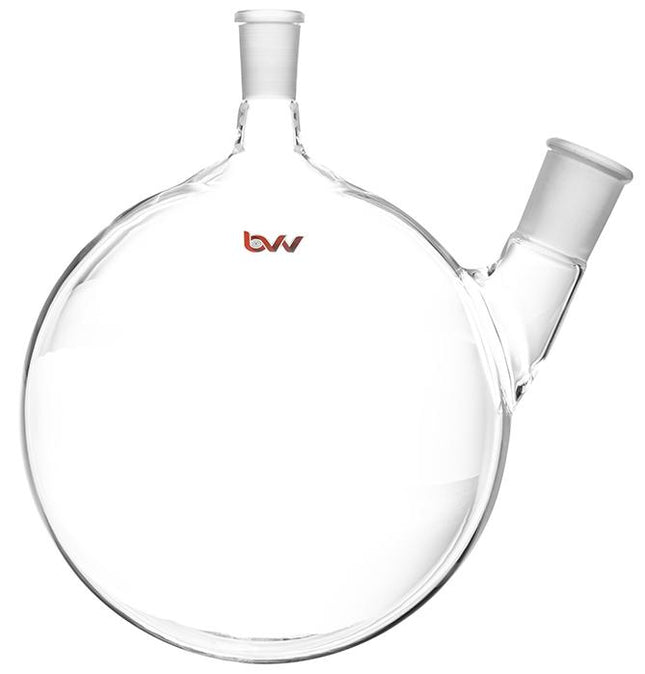
2 Neck Offset Round Heavy Wall Bottom Flask - USA Made
2 Neck Offset Round Bottom Heavy Wall Flask This USA made 2 Neck Offest flask is designed specifically for Short Path Distillation units and offsets the distillation head and cow so there is more clearance from the heating mantle. These flasks are made of heavy walled borosilicate and both have a 24/40 Female joint at a 20° Angle perfect for a heating mantle probe. Specifications Material Heavy Wall Borosilicate Sizes Available: 2000ml - 24/40 Joints 5000ml - 24/40 20° Angled Joint and 34/45 Offset Joint 10000ml - 24/40 20° Angled Joint and 45/50 Center Joint MADE in the USA *Notice to customers: All units are inspected for broken glassware or parts before leaving BVV™. If the unit arrives damaged (this does not include minor imperfections or scuffs in glassware), the customer MUST contact BVV™ within 72 hours from carrier delivery to file a claim. If the customer DOES NOT contact BVV™ within 72 hours from carrier delivery, then BVV™ cannot issue any replacement(s) or compensation for the item; a new purchase will need to be made for a replacement. **Glassware Safety Disclaimer: BVV™ is not responsible for failure of glassware which must be inspected before and after every use because it may eventually develop imperfections or damage through normal usage, mishandling, and stress caused by temperature variations. If an imperfection or damage is noted while inspecting the glassware DO NOT use the glassware because it can fail causing bodily harm or damage to the surrounding area.**
$235.00 - $1,000.00
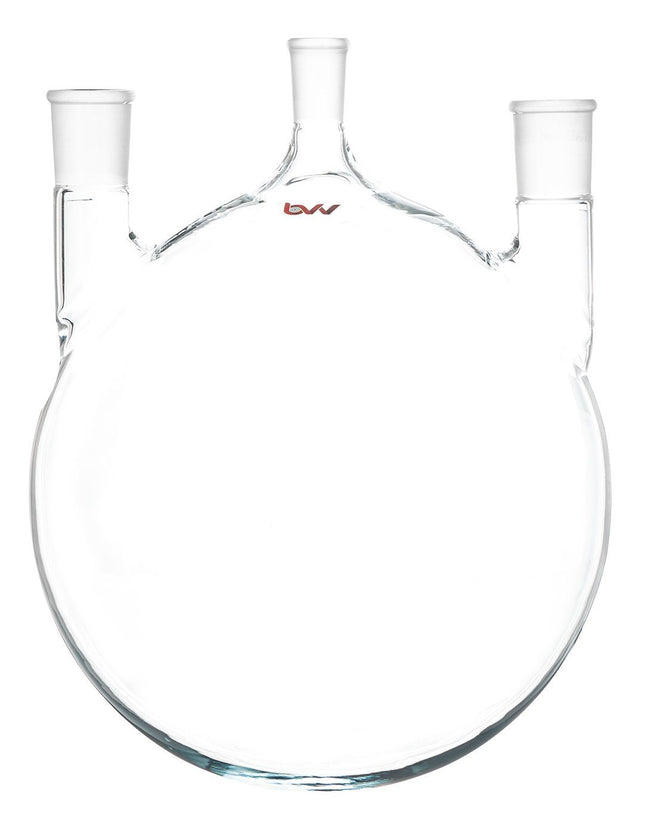
3 Neck Heavy Wall Round Bottom Flask - USA Made
3 Neck Heavy Wall Round Bottom Flask - USA Made This USA made 3 Heavy Wall Round Bottom Flask is designed specifically for Short Path Distillation units and allows dual distillation heads and cows so there is more vapor flow from the heating mantle. These flasks are made of heavy walled borosilicate. Specifications Material Heavy Wall Borosilicate Sizes Available: 10000ml - 24/40 Center Joint and 34/45 Side Joints 20000ml - 24/40 Center Joint and 45/50 Side Joints MADE in the USA *Notice to customers: All units are inspected for broken glassware or parts before leaving BVV™. If the unit arrives damaged (this does not include minor imperfections or scuffs in glassware), the customer MUST contact BVV™ within 72 hours from carrier delivery to file a claim. If the customer DOES NOT contact BVV™ within 72 hours from carrier delivery, then BVV™ cannot issue any replacement(s) or compensation for the item; a new purchase will need to be made for a replacement. **Glassware Safety Disclaimer: BVV™ is not responsible for failure of glassware which must be inspected before and after every use because it may eventually develop imperfections or damage through normal usage, mishandling, and stress caused by temperature variations. If an imperfection or damage is noted while inspecting the glassware DO NOT use the glassware because it can fail causing bodily harm or damage to the surrounding area.**
$690.00 - $1,375.00
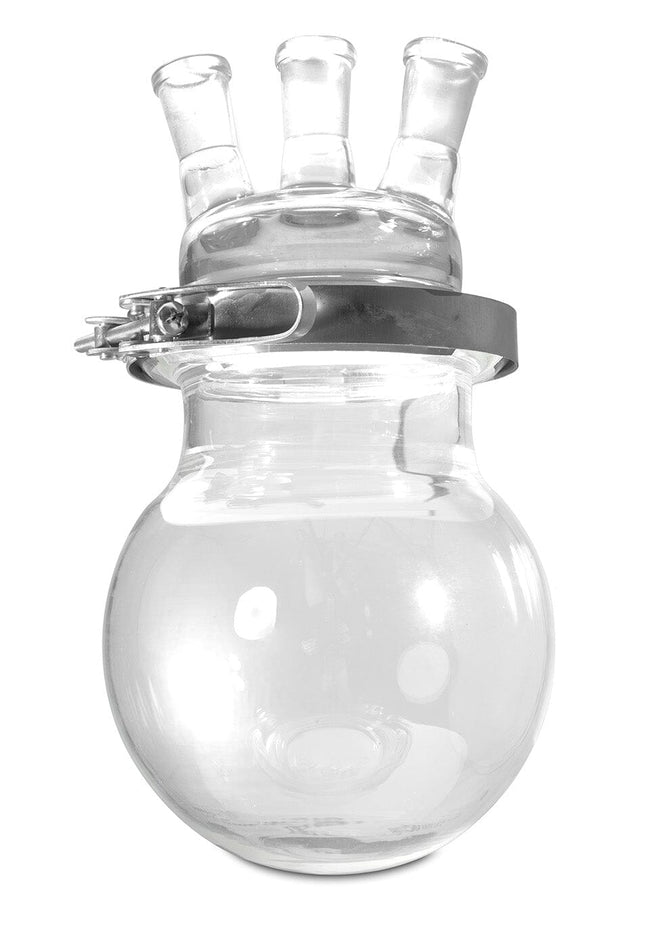
2 Liter BVV 3 - Neck Decarb Flask Kit
BVV 3 - Neck Decarb Flask Kit This 3 neck flask will fit in a 2L heating mantle. The flask can be used under vacuum but is ideal for use as a decarboxylation flask before running a short path setup. The lid has 3x 24/40 tapered glass joints.
$350.00$220.00

Cork Stand
Cork Stands Cork stands are used with laboratory glassware to help balance round bottom flasks or prevent damage or support a piece of glassware that is put on it. ***Note: Sizes correlate to round bottom flasks ml sizes. Sizes Available: 250-500ml 500-1000ml 1000-2000ml
$6.50 - $9.50
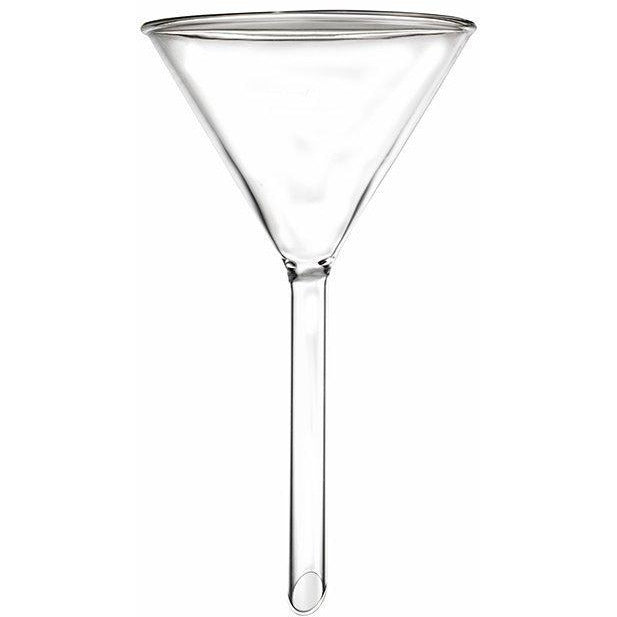
Glass Funnel Non-Jointed
Glass Funnel Non-Jointed This glass funnel is perfect for pouring liquids into any type of container and especially for small-mouthed bottles or flasks and comes in various diameters such as 50mm, 75mm, and 120mm. *Notice to customers: All units are inspected for broken glassware or parts before leaving BVV™. If the unit arrives damaged (this does not include minor imperfections or scuffs in glassware), the customer MUST contact BVV™ within 72 hours from carrier delivery to file a claim. If the customer DOES NOT contact BVV™ within 72 hours from carrier delivery, then BVV™ cannot issue any replacement(s) or compensation for the item; a new purchase will need to be made for a replacement. **Glassware Safety Disclaimer: BVV™ is not responsible for failure of glassware which must be inspected before and after every use because it may eventually develop imperfections or damage through normal usage, mishandling, and stress caused by temperature variations. If an imperfection or damage is noted while inspecting the glassware DO NOT use the glassware because it can fail causing bodily harm or damage to the surrounding area.**
$2.25 - $4.50
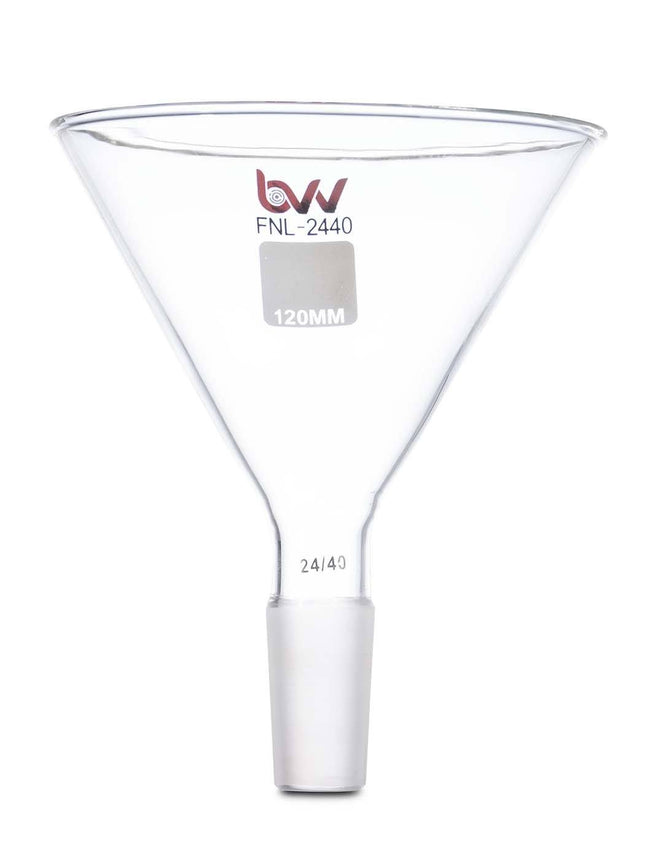
120mm Glass Funnel
120mm Glass Funnel 120mm Glass Funnel with 24/40 joint. *Notice to customers: All units are inspected for broken glassware or parts before leaving BVV™. If the unit arrives damaged (this does not include minor imperfections or scuffs in glassware), the customer MUST contact BVV™ within 72 hours from carrier delivery to file a claim. If the customer DOES NOT contact BVV™ within 72 hours from carrier delivery, then BVV™ cannot issue any replacement(s) or compensation for the item; a new purchase will need to be made for a replacement.
$22.00
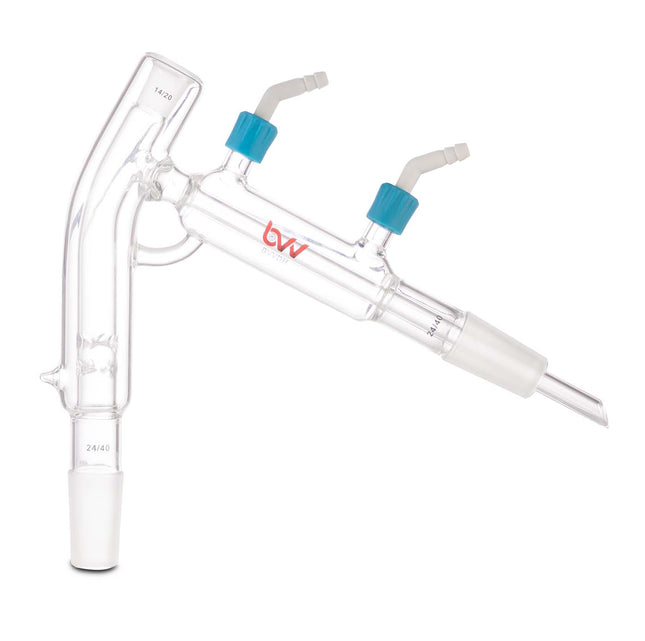
BVV™ Distillation Head
BVV™ Distillation Head BVV™ Brand Distillation head is made out of 3.3 Boro and comes with (2) 24/40 Ground Male Joints and a 14/20 Female thermometer joint at the top of the head. This head features 2x GL-14 barbs for the condenser and an extended drip tip for the receiving cow. The head measures 8.5" from the bottom 24/40 joint to the top of the head and the condenser is 3.5" long. The head has 2 sets of quad Vigreux and is bent at a 20-degree angle. *Notice to customers: All units are inspected for broken glassware or parts before leaving BVV™. If the unit arrives damaged (this does not include minor imperfections or scuffs in glassware), the customer MUST contact BVV™ within 72 hours from carrier delivery to file a claim. If the customer DOES NOT contact BVV™ within 72 hours from carrier delivery, then BVV™ cannot issue any replacement(s) or compensation for the item; a new purchase will need to be made for a replacement. **Glassware Safety Disclaimer: BVV™ is not responsible for failure of glassware which must be inspected before and after every use because it may eventually develop imperfections or damage through normal usage, mishandling, and stress caused by temperature variations. If an imperfection or damage is noted while inspecting the glassware DO NOT use the glassware because it can fail causing bodily harm or damage to the surrounding area.**
$192.00
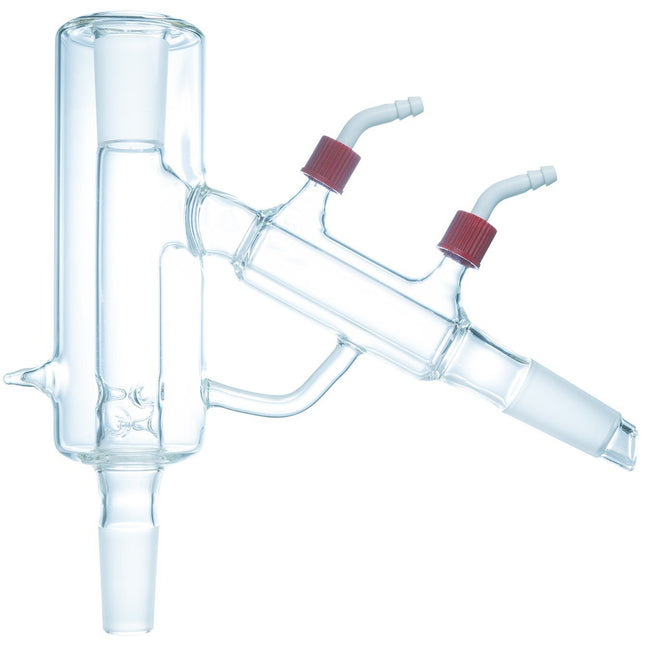
P2 Distillation Head - USA Made
P2 Distillation Head P2 Packable Distillation Head with 24/40 Joints. Includes GL-14 Barb Connections. Recommended packing media: Raschig Rings, Porcelain Berl Saddles, Glass Beads, Pro-Pak, or Stainless Steel Wool. Key Features: MADE IN THE USA Designed for 1 & 2 Liter Flasks Single set of lowered vigreaux to allow for packing media Larger vacuum jacket allows for less heat loss during distillations Larger vapor path to allow for gas/vapor phase flow Increased internal diameter for faster, more efficient fractioning as well as packing and unpacking of media Increased condenser length and diameter for more efficient condensation of vapor with zero clogging *Notice to customers: All units are inspected for broken glassware or parts before leaving BVV™. If the unit arrives damaged (this does not include minor imperfections or scuffs in glassware), the customer MUST contact BVV™ within 72 hours from carrier delivery to file a claim. If the customer DOES NOT contact BVV™ within 72 hours from carrier delivery, then BVV™ cannot issue any replacement(s) or compensation for the item; a new purchase will need to be made for a replacement. **Glassware Safety Disclaimer: BVV™ is not responsible for failure of glassware which must be inspected before and after every use because it may eventually develop imperfections or damage through normal usage, mishandling, and stress caused by temperature variations. If an imperfection or damage is noted while inspecting the glassware DO NOT use the glassware because it can fail causing bodily harm or damage to the surrounding area.**
$775.00
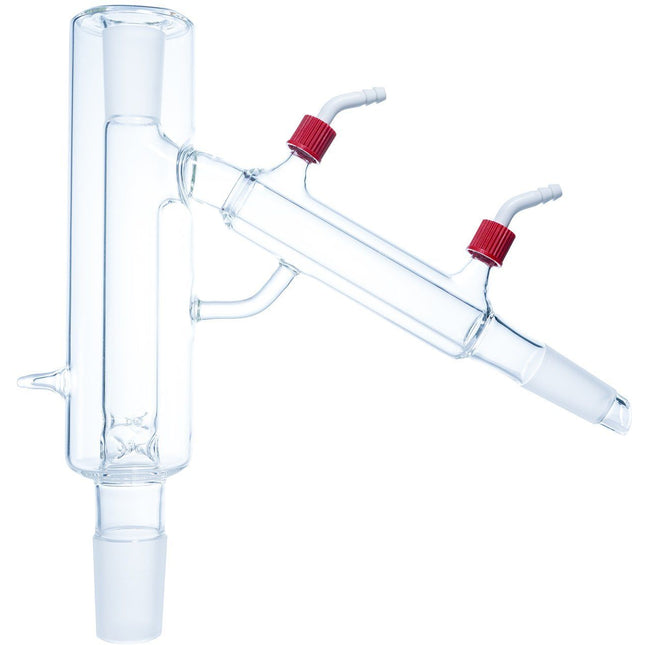
P5 Distillation Head - USA Made
P5 Distillation Head P5 Packable Distillation Head with 34/45 lower joint and 24/40 upper and side joints. Includes GL-14 Barb Connections. Recommended packing media: Raschig Rings, Porcelain Berl Saddles, Glass Beads, Pro-Pak, or Stainless Steel Wool. Key Features: MADE IN THE USA Designed for 5 Liter Flasks Single set of lowered vigreaux to allow for packing media Larger vacuum jacket allows for less heat loss during distillations Larger vapor path to allow for gas/vapor phase flow Increased internal diameter for faster, more efficient fractioning as well as packing and unpacking of media Increased condenser length and diameter for more efficient condensation of vapor with zero clogging *Notice to customers: All units are inspected for broken glassware or parts before leaving BVV™. If the unit arrives damaged (this does not include minor imperfections or scuffs in glassware), the customer MUST contact BVV™ within 72 hours from carrier delivery to file a claim. If the customer DOES NOT contact BVV™ within 72 hours from carrier delivery, then BVV™ cannot issue any replacement(s) or compensation for the item; a new purchase will need to be made for a replacement. **Glassware Safety Disclaimer: BVV™ is not responsible for failure of glassware which must be inspected before and after every use because it may eventually develop imperfections or damage through normal usage, mishandling, and stress caused by temperature variations. If an imperfection or damage is noted while inspecting the glassware DO NOT use the glassware because it can fail causing bodily harm or damage to the surrounding area.**
$850.00
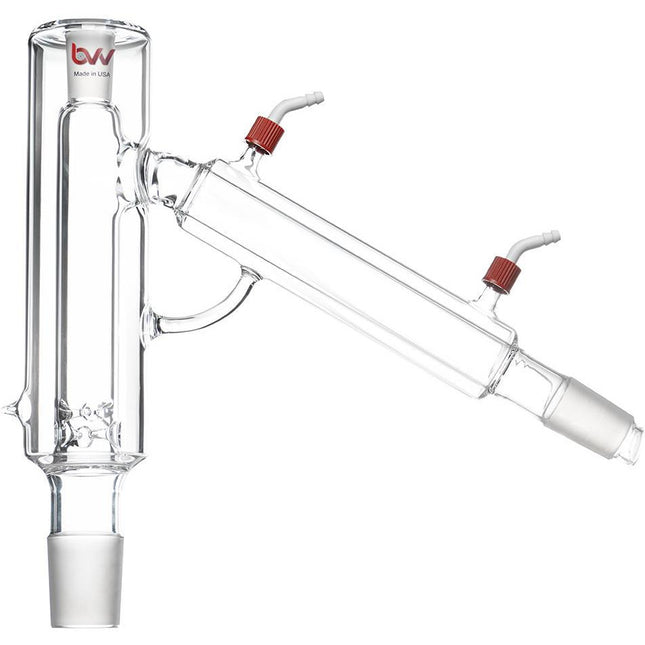
P10 BVV™ Distillation Head - USA Made
P10 BVV™ Distillation Head P10 Distillation Head has 2 sets of vigreux in the distillation column with 45/50 lower joint, 24/40 Thermometer Joint, and 34/45 side joint and includes GL-14 barb connections. MADE IN THE USA Designed for 10 Liter Flasks Set of 2 vigreux to allow for more packing media Larger vacuum jacket allows for less heat loss during distillations Larger vapor path to allow for gas/vapor phase flow Increased internal diameter for faster, more efficient fractioning as well as packing and unpacking of media Increased condenser length and diameter for more efficient condensation of vapor with zero clogging *Notice to customers: All units are inspected for broken glassware or parts before leaving BVV™. If the unit arrives damaged (this does not include minor imperfections or scuffs in glassware), the customer MUST contact BVV™ within 72 hours from carrier delivery to file a claim. If the customer DOES NOT contact BVV™ within 72 hours from carrier delivery, then BVV™ cannot issue any replacement(s) or compensation for the item; a new purchase will need to be made for a replacement. **Glassware Safety Disclaimer: BVV™ is not responsible for failure of glassware which must be inspected before and after every use because it may eventually develop imperfections or damage through normal usage, mishandling, and stress caused by temperature variations. If an imperfection or damage is noted while inspecting the glassware DO NOT use the glassware because it can fail causing bodily harm or damage to the surrounding area.**
$700.00
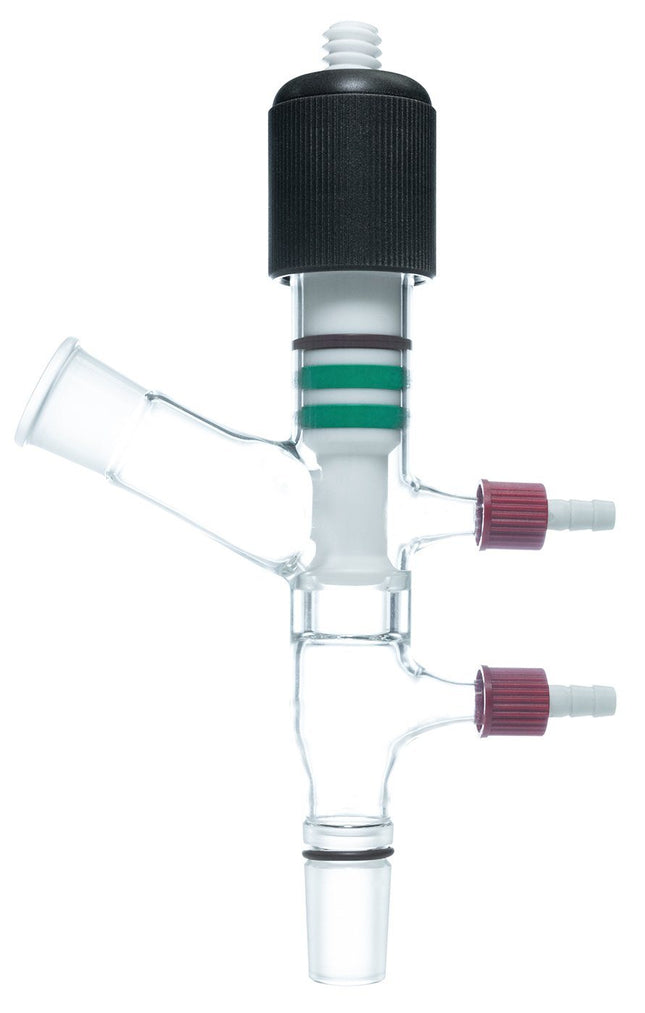
Valved Vacuum Adapter - USA Made
Valved Vacuum Adapter This Valved Vacuum Adapter allows the user to isolate the vacuum in a short path distillation system from the cow or receiving flasks of the system to allow the easy swap of the flasks. This adapter has 24/40 Joints with the male joint having a grease-less Viton O-ring seal which reduces contamination and mess for each fraction. It also includes (2) 8mm GL-14 Hose Barb fittings with a PTFE threaded valve with Viton Seals. *Notice to customers: All units are inspected for broken glassware or parts before leaving BVV™. If the unit arrives damaged (this does not include minor imperfections or scuffs in glassware), the customer MUST contact BVV™ within 72 hours from carrier delivery to file a claim. If the customer DOES NOT contact BVV™ within 72 hours from carrier delivery, then BVV™ cannot issue any replacement(s) or compensation for the item; a new purchase will need to be made for a replacement. **Glassware Safety Disclaimer: BVV™ is not responsible for failure of glassware which must be inspected before and after every use because it may eventually develop imperfections or damage through normal usage, mishandling, and stress caused by temperature variations. If an imperfection or damage is noted while inspecting the glassware DO NOT use the glassware because it can fail causing bodily harm or damage to the surrounding area.**
$520.00

Single Neck Cow Distribution Adapter 24/40 Joints
This distribution adapter is used in a short path distillation setup to attach to a single receiving flask and to the vacuum system. The two ground joints are 24/40 to fit the distillation head and receiving flask. The vacuum connection is a GL-14 threaded port.
$160.00$100.00
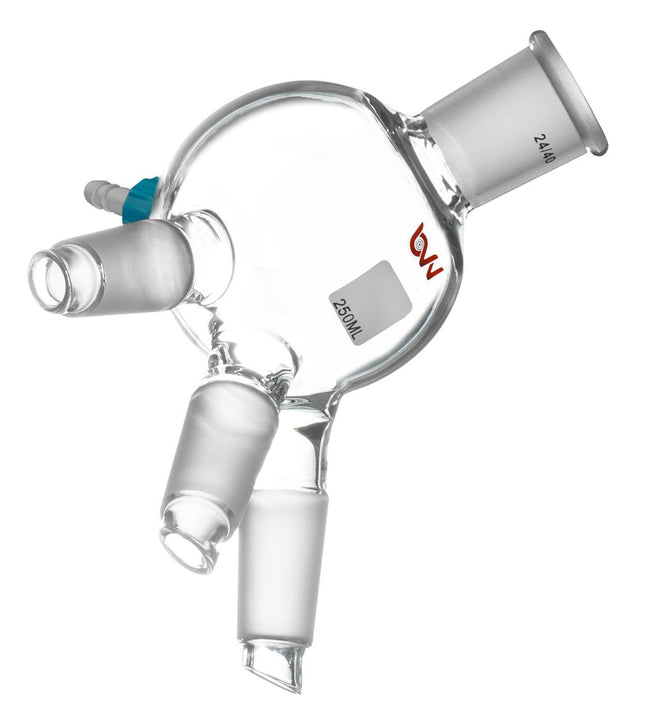
Triple Neck Cow Receiving Flask
Triple Neck Cow Receiving Flask Triple Neck Cow Receiving Flask with 24/40 female joints. Triple neck cow receiver volume is 250ml. Includes GL-14 port. *Notice to customers: All units are inspected for broken glassware or parts before leaving BVV™. If the unit arrives damaged (this does not include minor imperfections or scuffs in glassware), the customer MUST contact BVV™ within 72 hours from carrier delivery to file a claim. If the customer DOES NOT contact BVV™ within 72 hours from carrier delivery, then BVV™ cannot issue any replacement(s) or compensation for the item; a new purchase will need to be made for a replacement. **Glassware Safety Disclaimer: BVV™ is not responsible for failure of glassware which must be inspected before and after every use because it may eventually develop imperfections or damage through normal usage, mishandling, and stress caused by temperature variations. If an imperfection or damage is noted while inspecting the glassware DO NOT use the glassware because it can fail causing bodily harm or damage to the surrounding area.**
$79.00
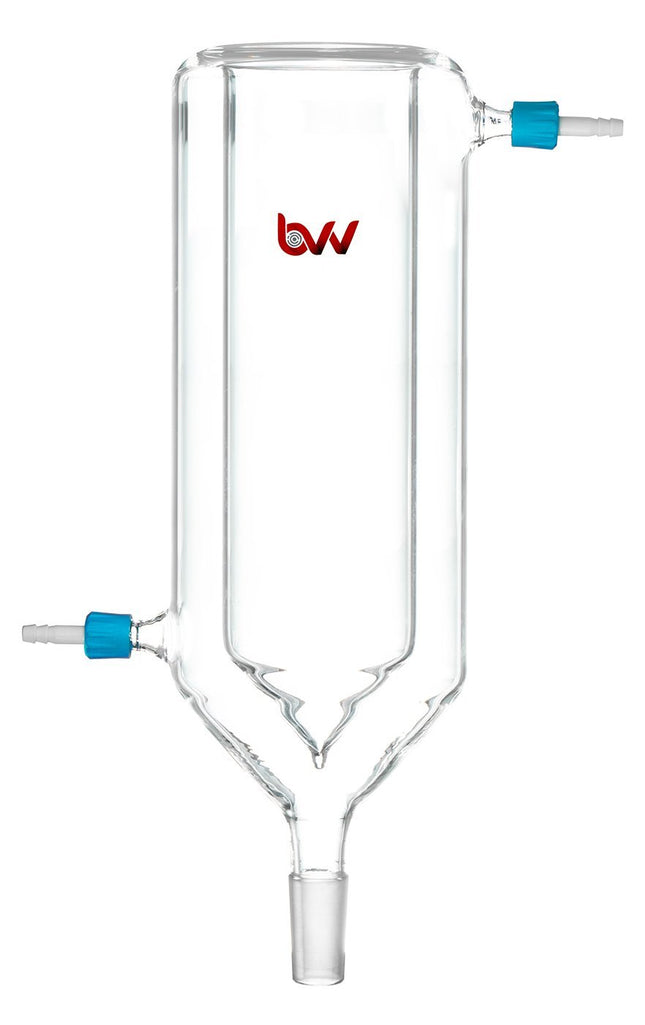
BVV™ Dewar Glass Cold Trap
BVV™ Dewar Glass Cold Trap This dewar style glass is designed for maximum vapor condensation and it also has a 24/40 bottom joint and (2) GL-14 8mm Hose Barbs *Notice to customers: All units are inspected for broken glassware or parts before leaving BVV™. If the unit arrives damaged (this does not include minor imperfections or scuffs in glassware), the customer MUST contact BVV™ within 72 hours from carrier delivery to file a claim. If the customer DOES NOT contact BVV™ within 72 hours from carrier delivery, then BVV™ cannot issue any replacement(s) or compensation for the item; a new purchase will need to be made for a replacement.
$250.00
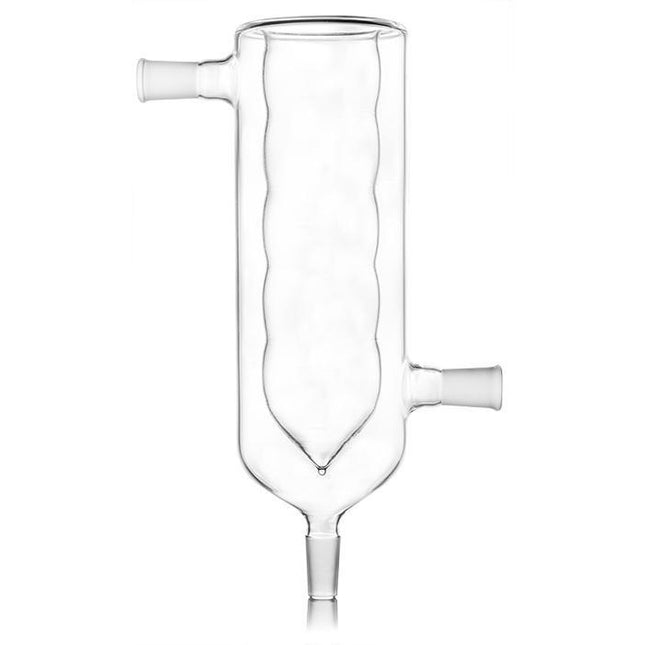
BVV™ Glass Cold Trap - Ribbed (Made in USA)
BVV™ Glass Cold Trap - Ribbed This dewar style glass is designed to increase surface area for maximum vapor condensation and it also has 24/40 or 34/45 jointed connections to increase vapor flow. Note: The bottom joint will always be 24/40. *Notice to customers: All units are inspected for broken glassware or parts before leaving BVV™. If the unit arrives damaged (this does not include minor imperfections or scuffs in glassware), the customer MUST contact BVV™ within 72 hours from carrier delivery to file a claim. If the customer DOES NOT contact BVV™ within 72 hours from carrier delivery, then BVV™ cannot issue any replacement(s) or compensation for the item; a new purchase will need to be made for a replacement.
$790.00
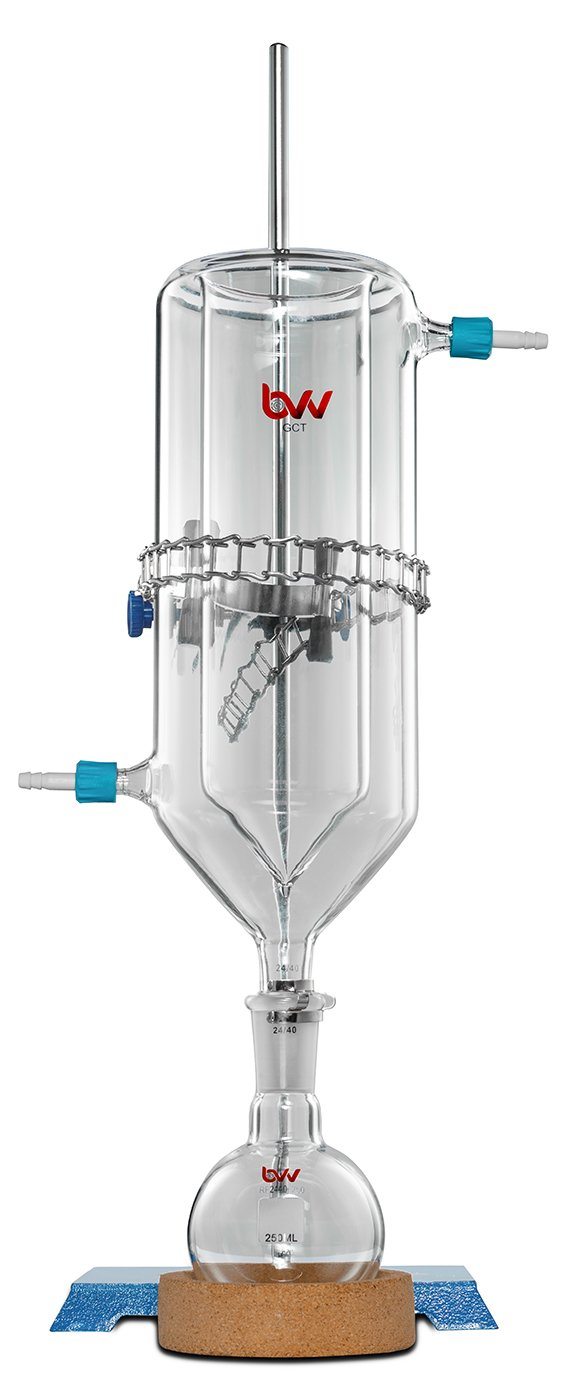
BVV™ Dewar Style Glass Cold Trap Kit
Dewar Style Glass Cold Trap The Dewar Style Glass Cold Trap with GL-14 Barb Fittings allows the user to load dry ice into the inner portion of the cold trap from the top to allow maximum condensation temperatures. This protects your vacuum pump and captures any vapors that were lost during evaporation or distillation. Made in the USA. Dewar Style Glass Cold Traps includes the following: Metal Keck Clip Boss Head Lab Stand Chain Clamp 250ml Round Bottom Flask 24/40 Joint 250-500ml Cork Stand Specifications: USA Made 24/40 Male Ground Joint GL-14 8mm Barb Connections OD = 3.8" ID = 2.75" Height = 14.75" *Notice to customers: All units are inspected for broken glassware or parts before leaving BVV™. If the unit arrives damaged (this does not include minor imperfections or scuffs in glassware), the customer MUST contact BVV™ within 72 hours from carrier delivery to file a claim. If the customer DOES NOT contact BVV™ within 72 hours from carrier delivery, then BVV™ cannot issue any replacement(s) or compensation for the item; a new purchase will need to be made for a replacement. **Glassware Safety Disclaimer: BVV™ is not responsible for failure of glassware which must be inspected before and after every use because it may eventually develop imperfections or damage through normal usage, mishandling, and stress caused by temperature variations. If an imperfection or damage is noted while inspecting the glassware DO NOT use the glassware because it can fail causing bodily harm or damage to the surrounding area.**
$350.00
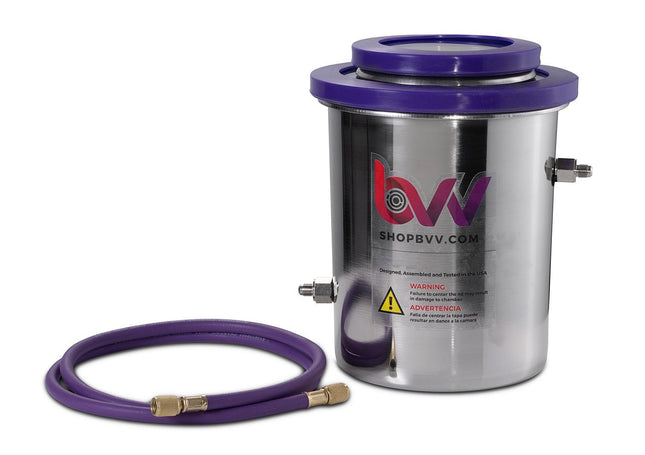
1.5 Gallon Cold Trap (2QT Tank) Dry Ice, Liquid Nitrogen
1.5 Gallon Cold Trap (2QT Tank) Dry Ice, Liquid Nitrogen (Comes with 2 Year Limited warranty) This is a complete cold trap and will come assembled for instant use. This cold trap is made of 304SS MADE IN USA, utilizing Polycarbonate lids for durability, flexibility and chemical resistance to Ethanol and Isopropyl (not compatible with Acetone). This system is recommended to protect pump from condensable vapors. This trap comes with an industrial grade, heat cured silicone gasket designed only for our systems. There is nothing of equal quality in the market. The gasket itself is reversible (doubling the life of our system guaranteed) allowing customers to instantly take it off and flip it over. No adhesives are used! The system will maintain a vacuum seal only under vacuum. The vacuum pump will hold the interior 2 quart container for your dry ice slurry in compression with the larger outer lid. The larger outer lid will be held in compression with 1.5 gallon outer container. The connections on both sides are 1/4" MJIC flares or 1/4" Barbs that will connect to 1/4" HVAC or FJIC stainless steel hose. The center slurry container has a lid - this lid simply helps prevent evaporation of your slurry. Temperature rated for -100-160F This cold trap comes assembled and includes: (1) 1.5gl high strength stainless steel outer container (made of solid 304 stainless made in USA) (1) 2q interior slurry container (made of solid 304 stainless made in USA) (2) 1/2" thick clear polycarbonate lids (2) industrial grade silicone gasket (1) 1/4" HVAC hose 5' Can withstand max working temps of 392F gasket only 60A durometer density (1) max vacuum -29.5inHg (+/-.5Hg) (2) 1/4" MJIC or Barb Fittings Outside container internal dimensions: 7.25" diameter X 8.25" tall To help remove condensable vapors, or when liquid nitrogen traps are not practical, our cold trap is the best option for preventing vapors from getting into your vacuum pump and contaminating it. This 1.5 gallon trap uses polycarbonate lids for durability, flexibility, and chemical resistance. The system doesn’t use adhesives, and comes standard with a reversible gasket for enhanced quality that doubles its life. Made in the USA, the BVV™ Cold Trap comes with all parts pre-assembled, so you can get to work straight out of the box. Inside container internal dimension: 4.75" diameter by 6.5" tall
$230.00 - $240.00

1.5 Gallon Cold Trap (2QT Tank) Dry Ice, Liquid Nitrogen - GLASS LID
1.5 Gallon Cold Trap (2QT Tank) Dry Ice, Liquid Nitrogen - W/GLASS LID This is a complete Cold Trap and will come assembled for instant use. This Cold Trap is made of 304SS MADE IN USA, utilizing Glass lids for Durability, flexibility and Chemical Resistance to alcohol and solvents. This system is Recommended to protect pump from condensable vapors. This Trap comes with an industrial grade, heat cured silicone gasket designed only for our systems. There is nothing of equal quality in the market. The gasket itself is reversible (doubling the life of our system guaranteed) allowing customers to instantly take it off and flip it over. No adhesives are used! The system will maintain a vacuum seal only under vacuum. The vacuum pump will hold the interior 2 quart container for your Dry Ice Slurry in compression with the larger outer lid. The larger outer Lid will be held in compression with 1.5 gallon outer container. The connections on both sides are 1/4" MJIC flares or 1/4" Barbs that will connect to 1/4" HVAC or FJIC stainless steel hose. The Center Slurry Container has a lid for it, This lid simply helps prevent evaporation of your slurry. Temperature rated for -100-160F This Cold Trap comes assembled and includes: (1) 1.5gl high strength Stainless steel outer container (made of solid 304 stainless made in USA) (1) 2q interior Slurry Container (made of solid 304 stainless made in USA) (2) 1/2" thick clear Glass lids (2) Industrial grade silicone gasket (1) 1/4" HVAC Hose 5' Can withstand max working temps of 392F gasket only 60A durometer density (1) Max vacuum -29.5inHg (+/-.5Hg) (2) 1/4" MJIC or Barb Fittings Outside Container Internal Dimensions: 7.25" Diameter X 8.25" Tall To help remove condensable vapors, or when liquid nitrogen traps are not practical, our Cold Trap is the best option for preventing vapors from getting into your vacuum pump and contaminating it. This 1.5 gallon trap uses Glass lids for durability, flexibility, and chemical resistance. The system doesn’t use adhesives, and comes standard with a reversible gasket for enhanced quality that doubles its life. Made in the USA, the BVV™ Cold Trap comes with all parts pre-assembled, so you can get to work straight out of the box. Inside Container Internal Dimension: 4.75 Diameter by 6.5 Tall
$245.00 - $255.00
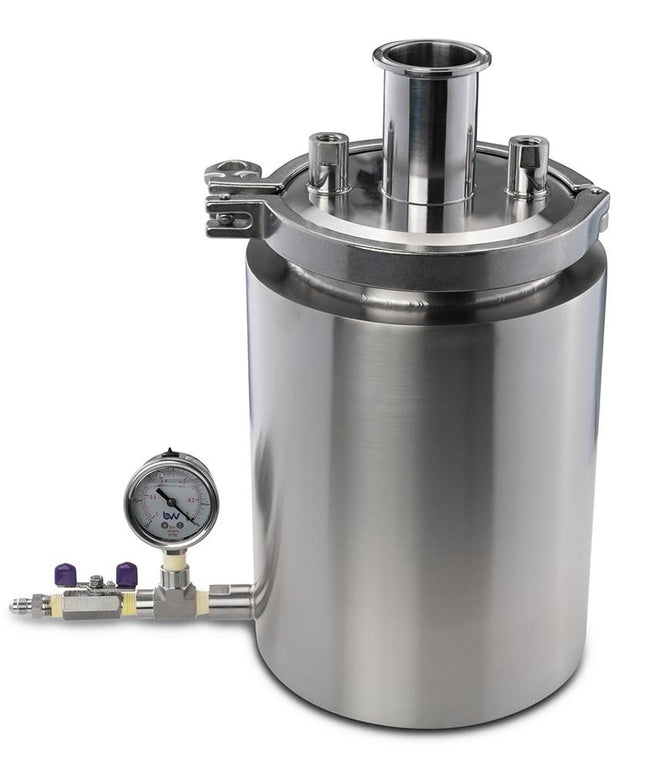
Cold Trap 2" Stainless Steel
Cold Trap 2" Stainless Steel This Stainless Steel Cold is designed and intended for use with the Polyscience IP60 Cold Finger (Can also be used with dry Ice) to create a cold trap that can achieve extremely frigid temperatures. These cold traps have 2 1/4" FNPT ports with one having a dip tube to the bottom of the trap to achieve higher vapor condensing rates with the 2" Diameter Center opening for the IP60. This Cold trap also has an insulating vacuum jacket around the entire container to maintain the subzero temperatures and help achieve the maximum minimal temperature of the IP60. Unlike many cold Traps on the market, this one is also made out of 304 Stainless steel and the internal parts are resistant to most chemicals and easily cleaned due to the Tri-Clamp lid design. Specifications Material 304 Stainless Steel Temperature Rating -200 to 200°C Ultimate Vacuum <100millitorr / microns Cold Finger Internal Dimensions 1.85" x 11.75" (Fits Polyscience IP60) Trap Internal Dimensions 5.85" x 10" Outside Dimensions 8" x 14" x 15" (Includes jacket gauge and valve hardware) Weight 28LBS
$465.00 - $508.00
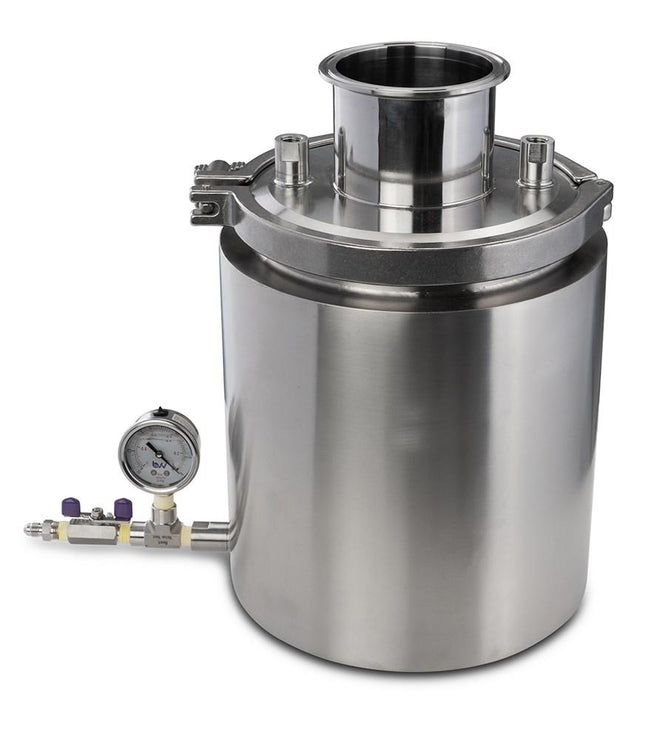
Cold Trap 4" Stainless Steel
Cold Trap 4" Stainless Steel This Stainless Steel Cold is designed and intended for use with the Polyscience IP100 Cold Finger (Can also be used with dry Ice) to create a cold trap that can achieve extremely frigid temperatures. These cold traps have 2 1/4" FNPT ports with one having a dip tube to the bottom of the trap to achieve higher vapor condensing rates with the 4" Diameter Center opening for the IP100. This Cold trap also has an insulating vacuum jacket around the entire container to maintain the subzero temperatures and help achieve the maximum minimal temperature of the IP60. Unlike many cold Traps on the market, this one is also made out of 304 Stainless steel and the internal parts are resistant to most chemicals and easily cleaned due to the Tri-Clamp lid design. Specifications Material 304 Stainless Steel Temperature Rating -200 to 200°C Ultimate Vacuum <100millitorr / microns Cold Finger Internal Dimensions 3.85" x 11.75" (Fits Polyscience IP100) Trap Internal Dimensions 7.85" x 10" Outside Dimensions 10" x 16" x 15" (Includes jacket gauge and valve hardware) Weight 38LBS
$550.00 - $600.00


You have seen 48 out of 97 products